
BitssCloud Dashboard Guide
This guide will help you with the basic information on BitssCloud dashboard usage and get acquainted with the possibilities it provides.
Here is a list of main sections:
- Creating and Managing Environments
- Function Icons for Environments
- Function Icons for Each Instance
- Import
- Marketplace
- Deployment Manager
- Tasks Panel
- Account Settings
- Upgrade Trial Account & Balance
- Additional Options: Search Box, Help, Email Address
Creating and Managing Environments
1. Click NEW ENVIRONMENT in the upper left corner of the dashboard.

2. The Environment topology dialogue box will be opened, where you can fully customize your environment settings.
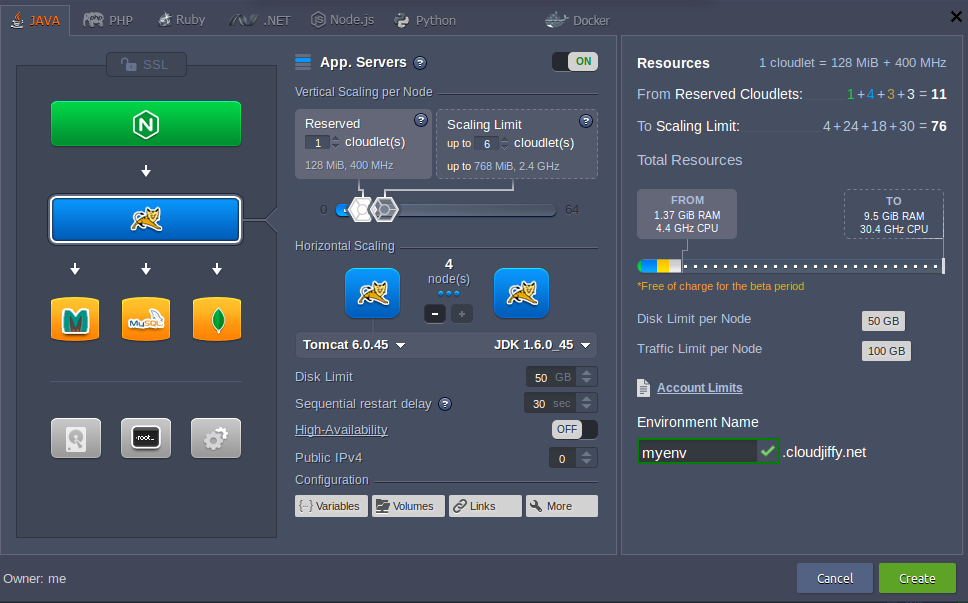
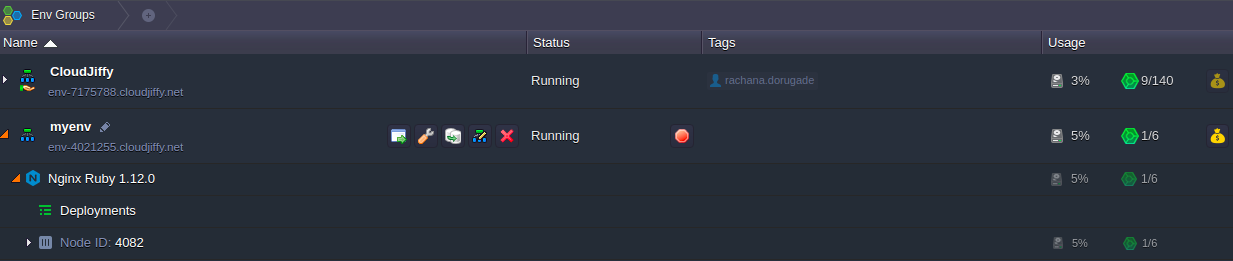
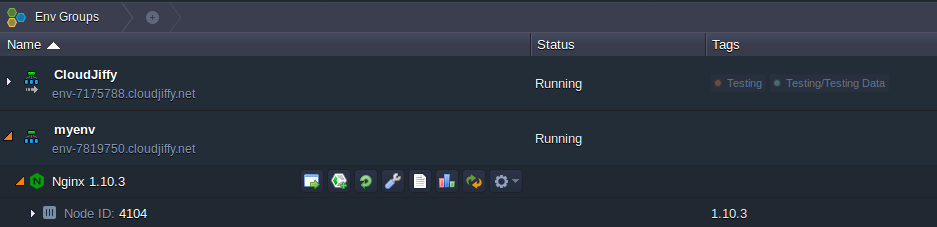
After finishing configurations, type name for your environment and click the Create button. 3. All of your environments will be listed in the upper pane of the admin panel, along with the following information within columns:

1. Name column includes the name (or alias if specified) of the environment, its domain. Using the triangle mark before the environment’s name, you can expand the list of nodes it includes.
2. The status column shows the permanent state of your environment (Running, Sleeping, Stopped) or some temporary interim process it is currently undergoing (Creating, Launching, Stopping, Cloning, Exporting, Installing, Migrating, Deleting).
3. Tags column indicates the name of the owner who created the environment.
4. Usage column shows the number of cloudlets and the percentage of available disk space that the environment currently consumes. You can also find the Billing history button![]() here, which leads to a separate tab with statistics on your spending (both overall and for every node separately), divided according to the specified time period.
here, which leads to a separate tab with statistics on your spending (both overall and for every node separately), divided according to the specified time period.
Function Icons for Environments
The main icons are as follows :
1. Open in browser
2. Settings
3. Clone environment
4. Change environment topology
5. Delete environment
1. Click the Open in browser icon![]() to open the environment in a new browser tab.
to open the environment in a new browser tab.
Note that this option could be absent in case your environment consists of Docker-based containers or just does not include an application server (i.e. no web interface is handled inside).
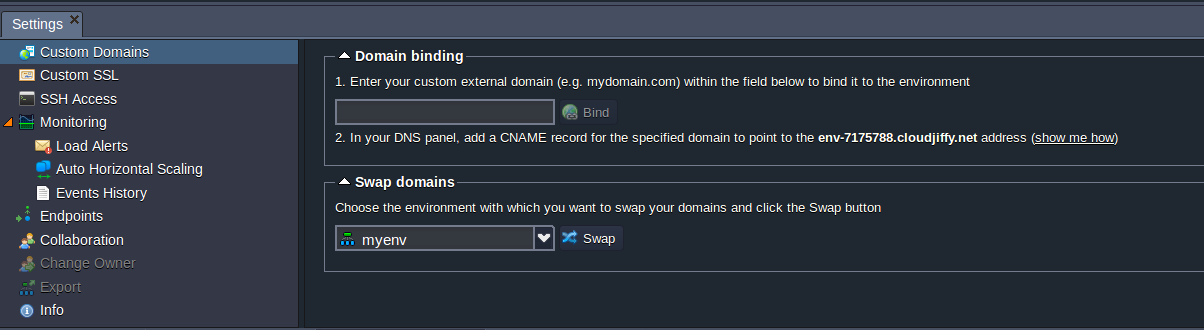
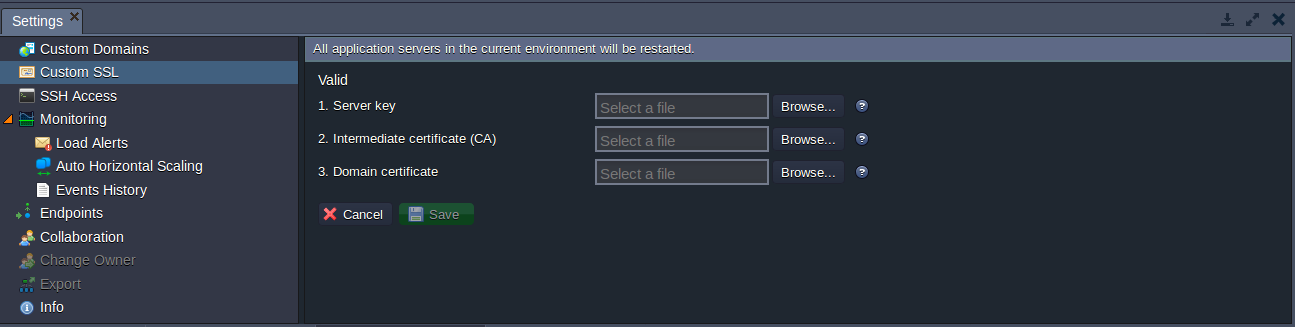
2 Click on Settings to![]() open a separate tab with a number of configuration sections. There are ten options here: Custom domains, Custom SSL, SSH Access, Monitoring, Endpoints, Migration, collaboration, Change Owner, Export, and Info.
open a separate tab with a number of configuration sections. There are ten options here: Custom domains, Custom SSL, SSH Access, Monitoring, Endpoints, Migration, collaboration, Change Owner, Export, and Info.
- Select Custom domains to access the following suboptions: Domain binding, and Swap domains
- Choose the Custom SSL option and upload the necessary files in order to apply your custom SSL Certificate.
- Select Monitoring in order to start tracking the number of resources your environment consumes.
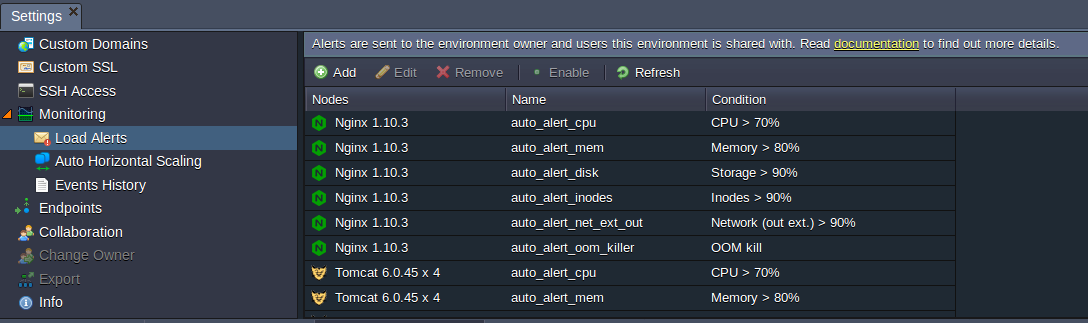
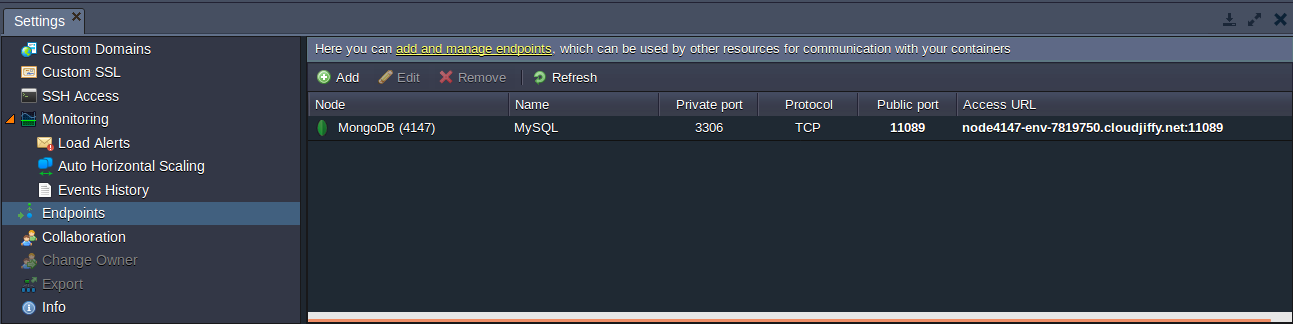
Use Load Alerts for setting new triggers (or adjusting the default ones) to receive special email notifications in case the specified resource’s usage exceeds the stated limits. Within the Auto, Horizontal Scaling suboption you can configure triggers for changing the amount of your web/application nodes depending on CPU, Memory, Network, Disk I/O, or Disk IOPS consumption. The Events History section contains records about all the events that occurred due to the configurations, set using the two abovementioned sections. - Within the Endpoints section, you can manage to map your containers’ TCP/UDP ports for ensuring their collaboration with external resources via direct connection
- Select collaboration to see the list of accounts that have access to the current environment.
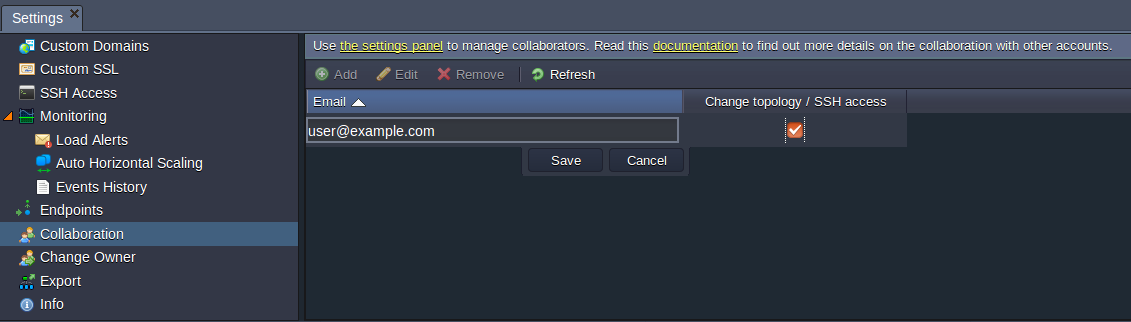
- If you need to share the environment with another account, click Add and fill in the Email field. You can also tick Change Topology / SSH Access if you would like to give such permissions to a user. Click Save.
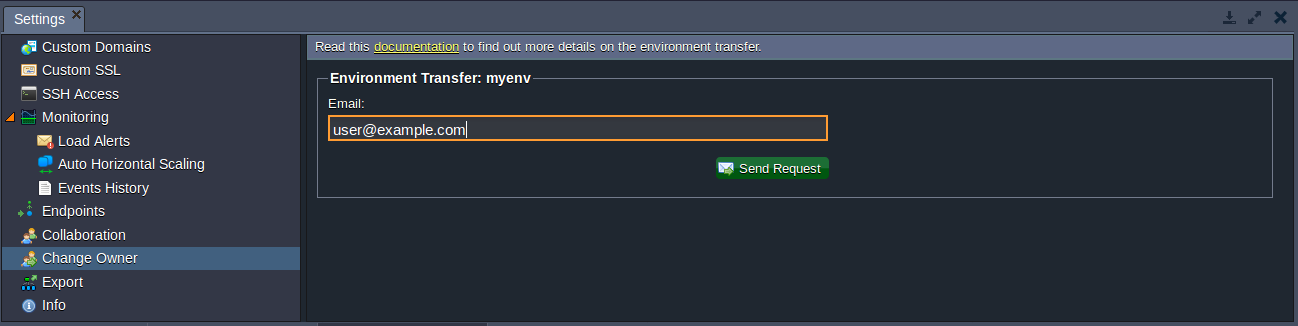
- Click Change Owner in order to transfer environment to another user account within the confines of a single platform.
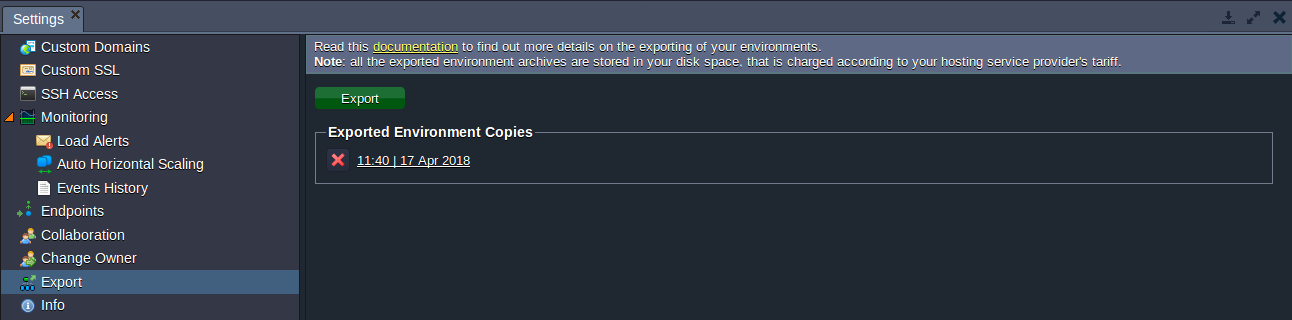
- Select Export in order to pack all your environment’s settings and data into a single downloadable file, that can be subsequently restored at another hosting provider’s platform for the creation of the identical and ready-to-use environment.Note that this feature is not currently available for Windows and Docker-based containers.
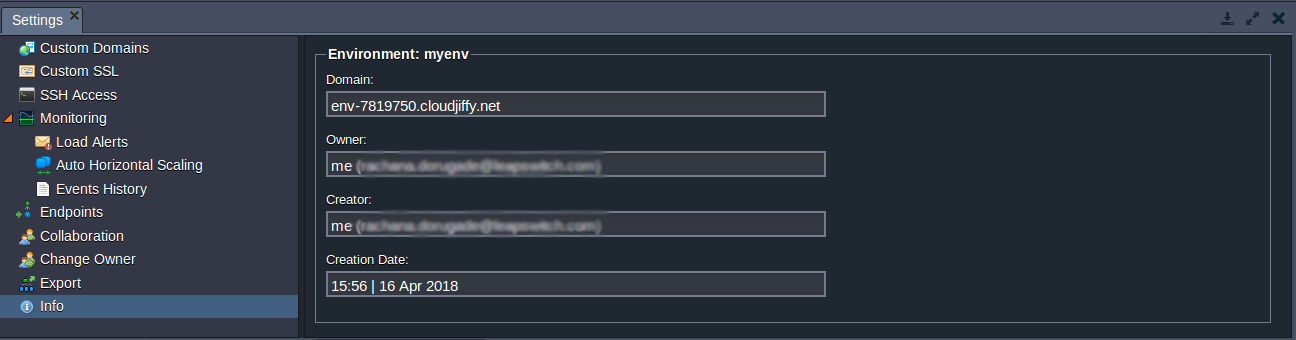
Switch to the Info section to see additional information on environment domain (except environments without application server), its creator/owner (as they can differ due to the account collaboration feature), hardware region it belongs to and the date/time of creation.
4. To Clone the environment, click on the appropriate button![]() . In the opened frame, specify the name for the new environment and click Clone.
. In the opened frame, specify the name for the new environment and click Clone.
5. In order to Change the environment topology, select the needed option.![]() Perform the required changes in the appeared Environment topology dialogue box and click Apply to submit them.
Perform the required changes in the appeared Environment topology dialogue box and click Apply to submit them.
6. To Delete an environment, click on the red cross icon and![]() confirm that you really want to do this by entering your password.
confirm that you really want to do this by entering your password.
Function Icons for Each InstanceClick on the triangle before the environment name within the upper frame to reveal a drop-down menu with the list of selected application servers, databases and other instances. You can also expand any of them in just the same way, to access separate containers and contexts with the deployed applications.
Over a particular instance or container to see the pop-up icons with different functions.
Use these icons to perform the following actions:
- Click the Open in browser option to open the application server, database, balancer, VPS node, Docker container or application context in a new browser tab.
- In order to Restart the node, select the same-named option and confirm your decision. In just the same way this can be done for a set of the same-type nodes.
- Select the Config option to open the Configuration Manager tab, where you can change the node’s settings by means of uploading and modifying files.
- Select the Log option to view the log files for a separate node or for the set of the same-type ones. Log files list can differ depending on the selected instance.
- Select the Statistics option to track the data on CPU, RAM, Network I/O, and Disk space consumption for a separate node or a set of nodes in real-time.
- Some nodes can also have optional buttons, such as Add-ons (for installing available pluggable modules) and Add project (for deploying apps via GIT/SVN). When hovering over a separate node, you’ll see one more Set-Alias
 icon. It allows you to set an alternative name for your node instead of the default Node ID label (e.g. to define master and slave servers in a DB cluster). The same thing can be done with the environment name, wherein its domain name will remain the same.

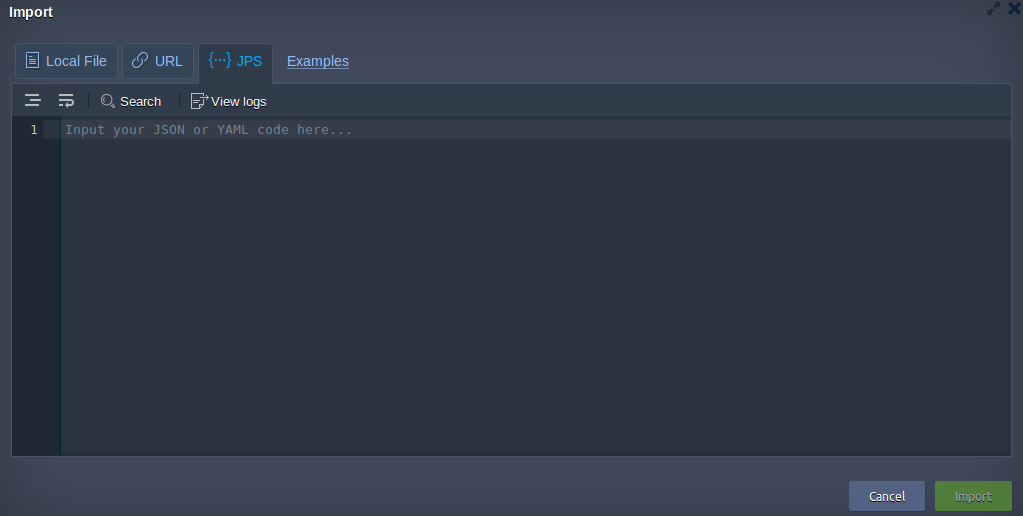
Import
Next, to the New environment option, you can find the Import button. It allows to upload .json, .jpsor .cs file in order to create new environment (or modify the already existing one with an add-on) according to the settings, declared in it.

Tip: In particular, this function can be used to import an environment copy, that was previously exported from another BitssCloud installation, and create the similar one at the current platform. Within the opened Import frame, you’ll see three tabs:
- Local File – select the locally stored file (via the Browse button), that should be uploaded and executed on a Platform
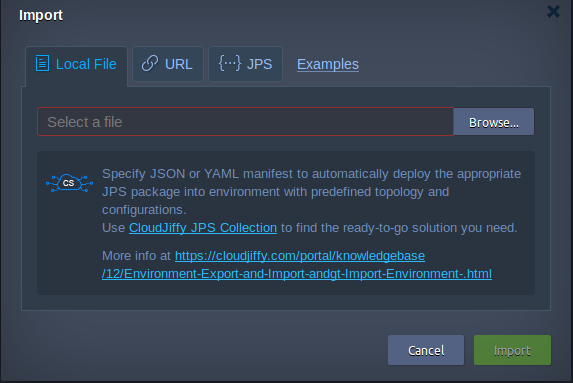
- URL – type in or paste a direct link to the required manifest file
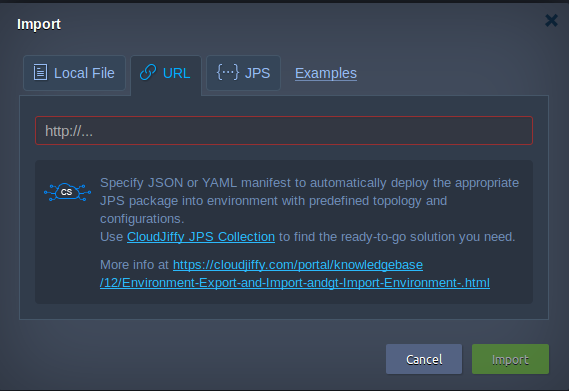
- JSON – the inbuilt JSON editor can be used to insert and edit your code before the deployment, or even to declare your package from the scratch manually
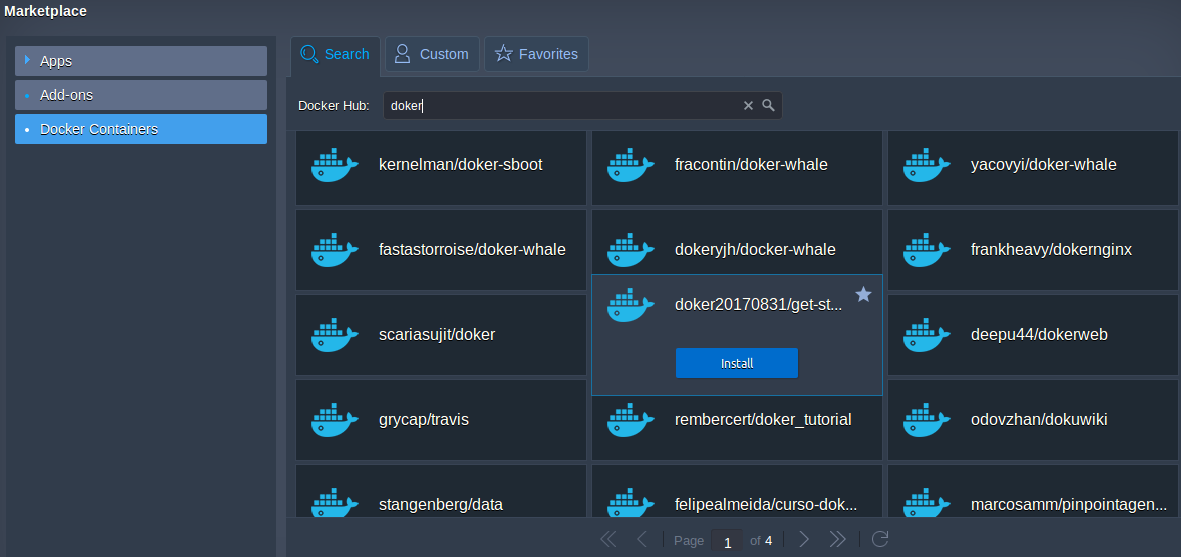
Marketplace
Upon clicking on the last Marketplace option at the top dashboard panel, you’ll access a separate frame with the Apps, Add-ons and Containers sections inside.
![]()
- The first Apps tab provides access to the list of preconfigured packaged applications.
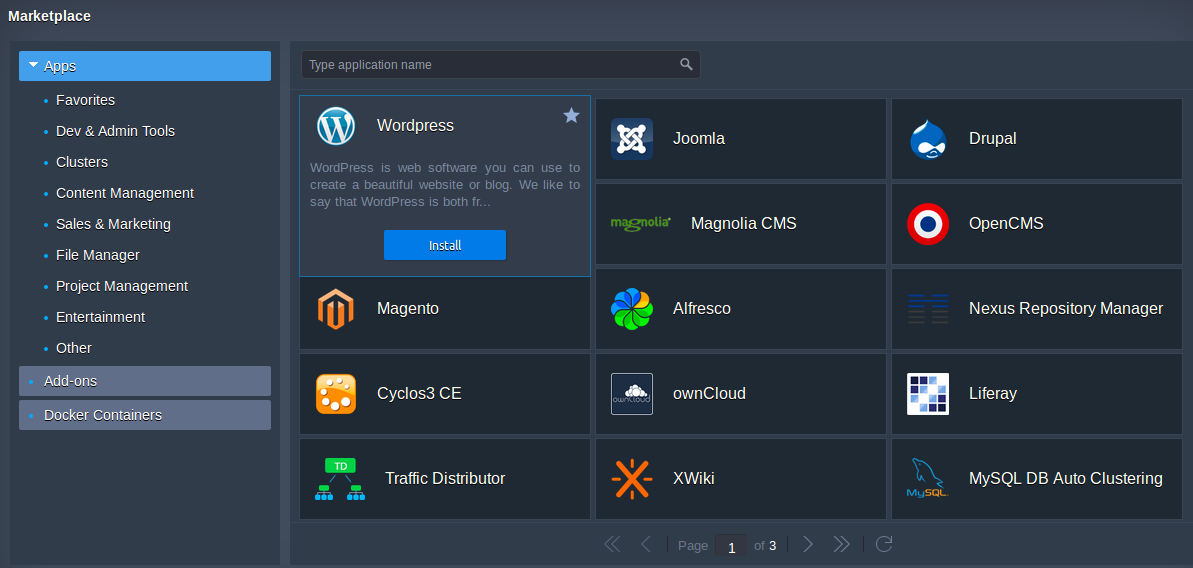 Locate the desired package (using the categorized list or search box) and click Install in order to automatically create an appropriate environment and deploy the chosen application to it.
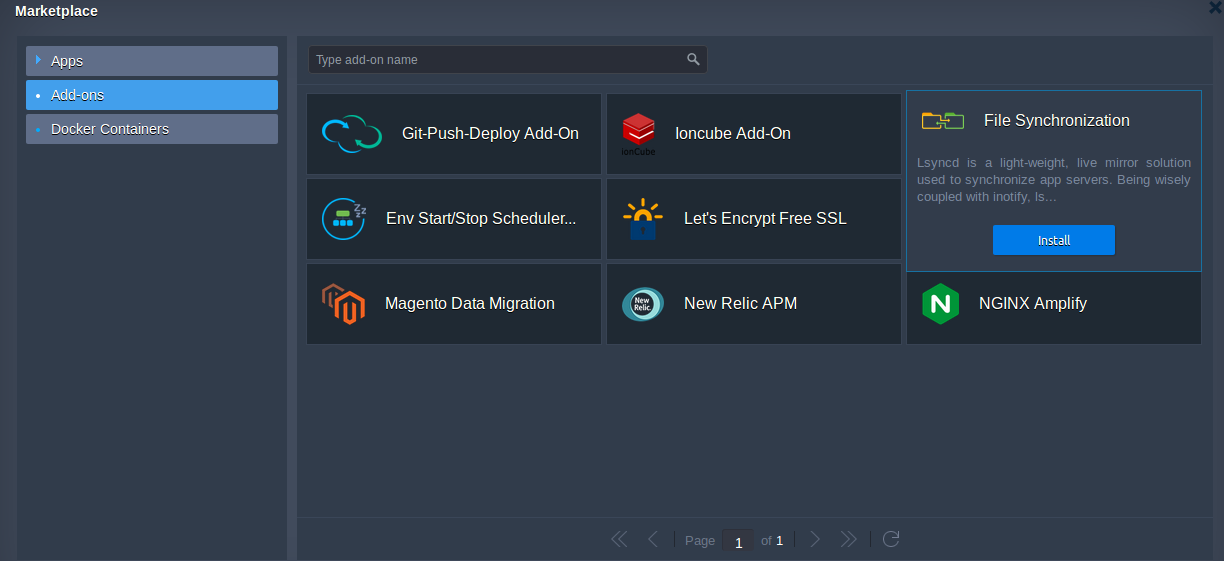
 - Within the Add-ons section, you can find a number of modules, which can be installed on top of the existing environment to modify it and get the advanced functionality.
- Choosing the Docker Containers suboption will open the panel, where you can find and subsequently deploy the desired Docker image through one of the available tabs:
- Search allows finding the required template within the official Docker Registry Hub
- The custom section provides the ability to add your own template from a custom registry
- Favourites tab lists solutions you’ve previously marked as favourite (with the gold star in the top right plank corner) to quickly access them
Deployment Manager
The Deployment Manager is used to upload application packages and subsequently deploy them to an application server of your running environment.
1. Click the Upload button to access the Upload archive dialogue box. Using it you can browse to the desired local file or specify a URL (http://, https:// or ftp://) in the appropriate tab. Note that the maximum available size of the uploaded local file is 150 MB. If your application size exceeds this limit, please use the URL option for uploading.
Fill in the Comment field if required and then click Upload.

2. Select the uploaded file and click the “Deploy to” button to see the list of suitable environments. Choose the one you would like to deploy your application to.

3. In the opened dialogue box, you can either just confirm the deployment (in this case the default root context will be used) or optionally set the desired custom context. Herewith, depending on the programming language used, this should be performed as follows:
- for Java/PHP/.NET – type the context name to the special field
- for Ruby – choose out of the proposed variants
- for Python and Node.js – a single predefined deployment path is used, thus specifying your custom contexts for these programming languages is not available
Note: Also, in case no custom context is specified, you can enable the ZDT deployment mode for your PHP application using the appropriate checkbox below.
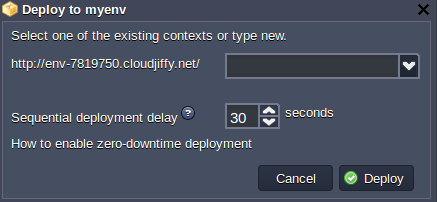
Click Deploy to initiate the process itself.
In our Deployment Guide, you can find a number of links to the instructions on different apps deployment, according to the programming languages they have been written in.
Tasks Panel
The Tasks panel is placed at the very bottom of the dashboard and contains live and historical data on the tasks that the BitssCloud engine is doing or has already done.

This panel includes the Date, Name, and Status columns, which give you detailed information on each task:
- When the action has taken place
- What has been performed
- Result of this action (i.e. Success if everything is OK or an error description if some problem occurred)

The Task panel tracks all global processes (like Creating an environment, Adding node(s), or Deploying context), as well as the subsequent changes and actions performed in the File manager (Creating a file, Renaming a file, Uploading file, etc).
Account Settings
Click the Settings button at the top-right corner of the dashboard in order to access a few more configurations, which are applied to the whole account.![]()
You’ll see two sections available here: SSH Keys and Collaboration.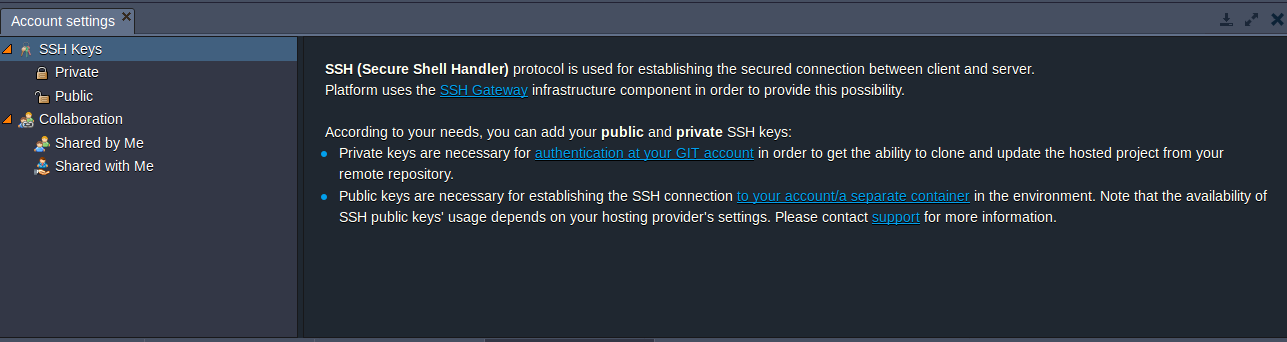
- SSH Keys – here you can find general information on the SSH protocol usage at BitssCloud and several useful links to our documentation with instructions for both private and public SSH keys. The same-named subsections can be found within the menu to the left. The Private one gives you the possibility to add the pre-generated private SSH keys to your BitssCloud account. Subsequently, they can be used for authentication at your private GIT/SVN repositories, allowing you to work with the remote secured projects directly from the BitssCloud dashboard. The Public subsection allows the binding of a public SSH key to your account, required for getting the ability to securely access and manage your containers via this protocol. The Collaboration option includes two items – Account Management and Shared with Me. Here, the first one allows you to share certain activities with other accounts by means of creating and configuring your own collaboration, while the second one is intended for managing the already shared with your accounts..
Additional Options: Help, Email AddressThere are several additional options in the upper right corner of the dashboard:
- Help (Contact support, Docs, API docs, Video, Go to the community, Show BitssCloud tutorial)
- Email address (Change password, Language, Sign out)
2. The Help drop-down menu gives you access to the Contact support, Docs, API docs, BitssCloud CLI, Video, Go to community and Show BitssCloud tutorial options.
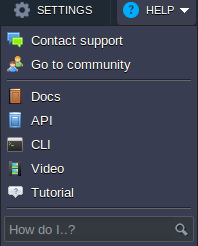
- Contact support is a hyperlink to your hoster’s Support page (sometimes available only for billing users)
- The Docs option is a hyperlink to the BitssCloud Devs Documentation
- The API docs option is a hyperlink to the BitssCloud API Documentation
- The Video option is a hyperlink to the BitssCloud Youtube Channel
- The BitssCloud CLI option is a hyperlink to the BitssCloud CLI Overview
- The Go-to community option links to the BitssCloud online community
3. The last option is your Login (email address). Click on it to open the drop-down list with the following options: Change password, Language, and Signout.

- Click Change Password to open the same-named dialogue box. Fill in the required fields (Current password, New password and Confirm password) and confirm your entries with the Change password button.
- Use the Language option to change the localization of the dashboard interface.
- Click Sign out to leave the dashboard.
Now you know all of the basic dashboard possibilities and hopefully won’t have any problems in using it. If you still have additional questions, please contact the Support Team of your hosting provider.