
Diaspora Ruby
How to install Diaspora into BitssCloud
Diaspora* is an open-source user-owned distributed social network with more than 1 million accounts all over the world. It consists of separate nodes named podes. Each pode operates a copy of the Diaspora software and represents a personal web server.
So, let’s find out how to create your own Diaspora* pode with the help of BitssCloud Platform-as-Infrastructure.
Create an Environment
1. Log in to the BitssCloud dashboard using your credentials.
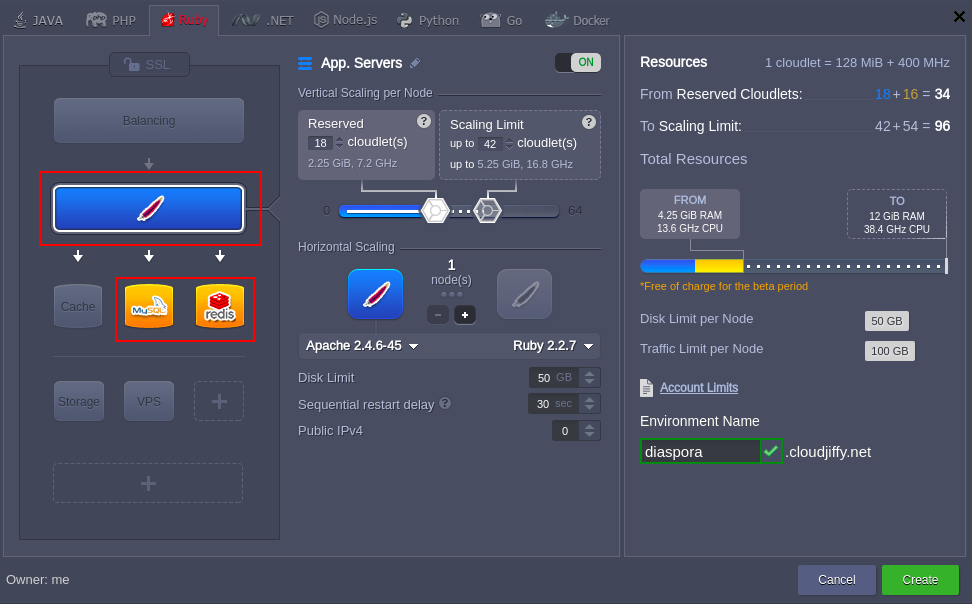
2. Press Create environment button. In the opened environment topology wizard navigate to the Rubyprogramming language tab. Pick the following nodes:
- Apache application server
- MySQL database
- Redis data structure server
| Note: Redis is an optional node. If you can’t find this server in the NoSQL section of your wizard, send a request to your hosting provider for its adding. |
Then state the resources limits for the chosen nodes. Finally, enter name for your environment (e.g. diaspora-network), and click Create button.
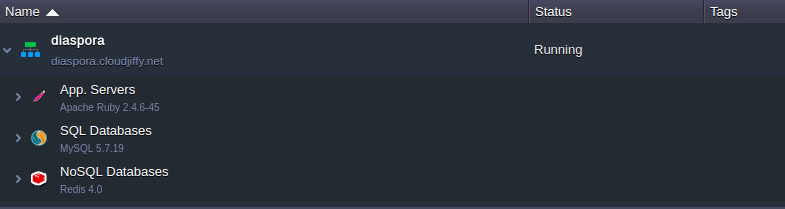
3. After about a minute your new environment will appear at the dashboard.
Diaspora* Deployment
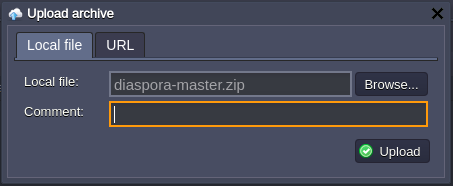
- Navigate to the Diaspora GitHub repository. There change the branch to master and click Download ZIP button.


You will be offered to save .zip archive with the latest Diaspora* stable version.
2. Then navigate back to the BitssCloud dashboard and upload this archive with the help of the Deployment manager.
3. Then press the Deploy to.. button next to the diaspora-master.zip package. In the opened window choose test deployment type and click Deploy.
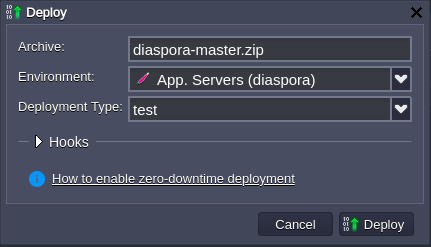
| Note: in order to run Diaspora* in production mode you need to have certificate authorities (CA) certificates installed at your server. |
4. The process of deployment can take some time, so be patient, please. Finally, you’ll see a new testcontext listed for Apache.

Database Configurations
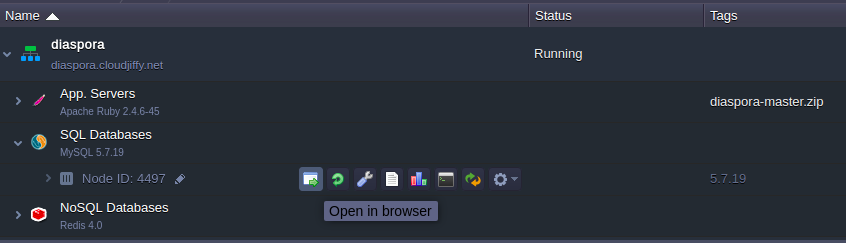
1. Press the Open in browser button next to the MySQL node in your environment.

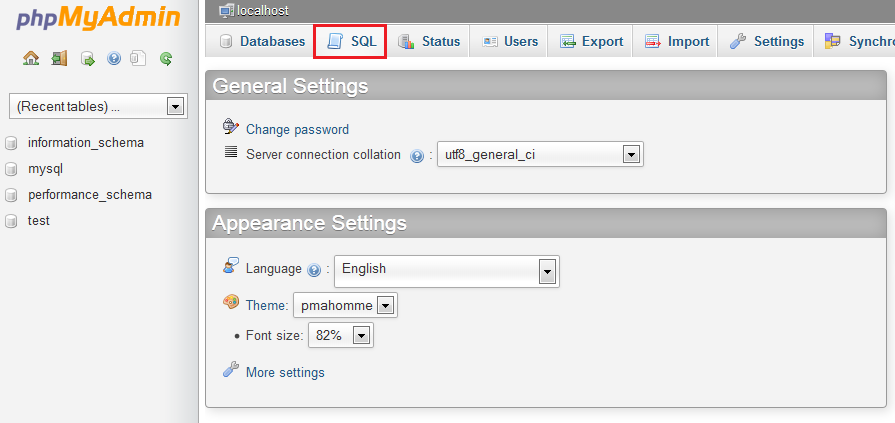
2. In the opened browser tab log in using the MySQL credentials you’ve received while environment creation and navigate to the SQL section.
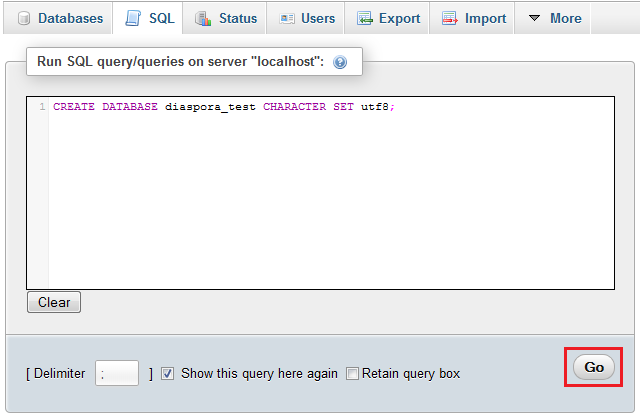
3. You’ll see an empty form for SQL request executing. Enter the following line there and click Go in orderto create a new database named diaspora_test.
CREATE DATABASE diaspora_test CHARACTER SET utf8;
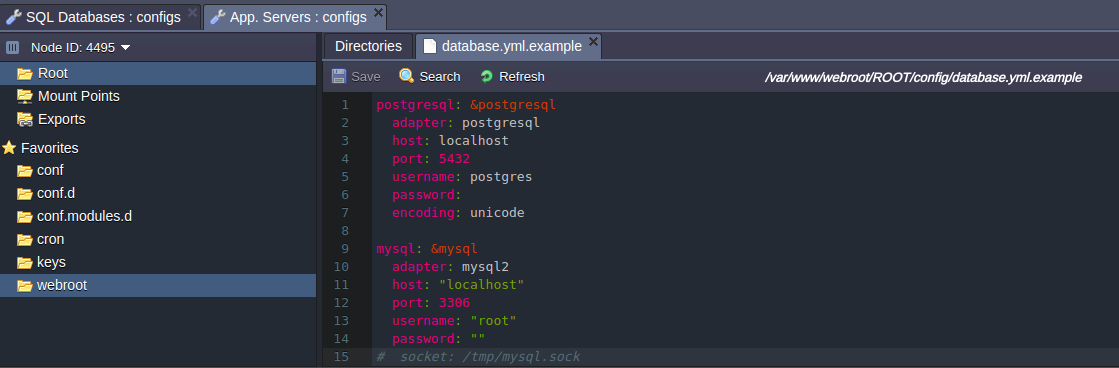
4. After that open BitssCloud dashboard again and press Config button for Apache application server.

5. In the opened configuration manager navigate to the webroot > config folder, find database.yml.example file and copy its content.
6. Then create new database.yml file in the same (config) folder and paste the copied strings to it.
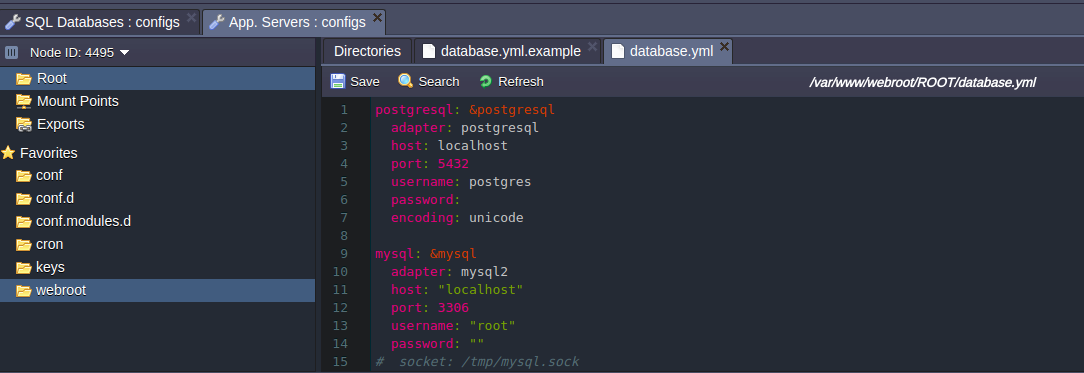
7. Now it’s necessary to set up the connection between your application and MySQL database.
Find the section for MySQL configurations. Specify your MySQL host (URL to your database without http://) and credentials you’ve received while environment creation in username and password strings.
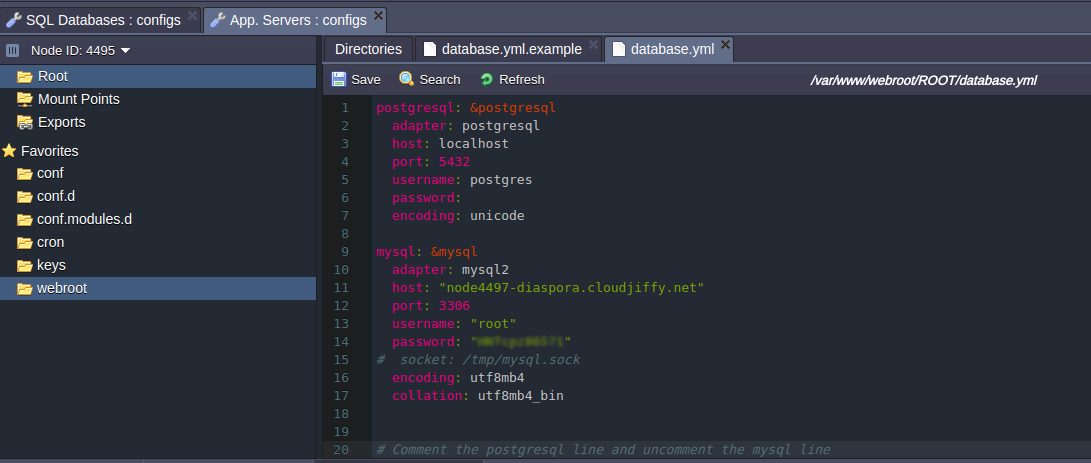
Don’t forget to Save the changes made.
Application Server and Redis Configurations
1. Press Config button for Apache application server again.

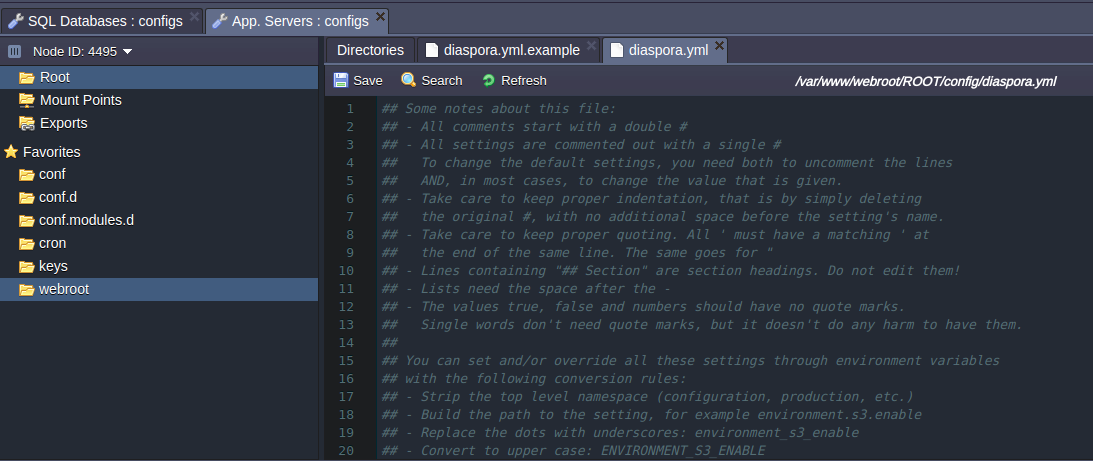
2. Navigate to the webroot > config folder and create a new diaspora.yml file there. Then find diaspora.yml.example configuration file in the same folder, copy its content, and paste it into the newly created file.
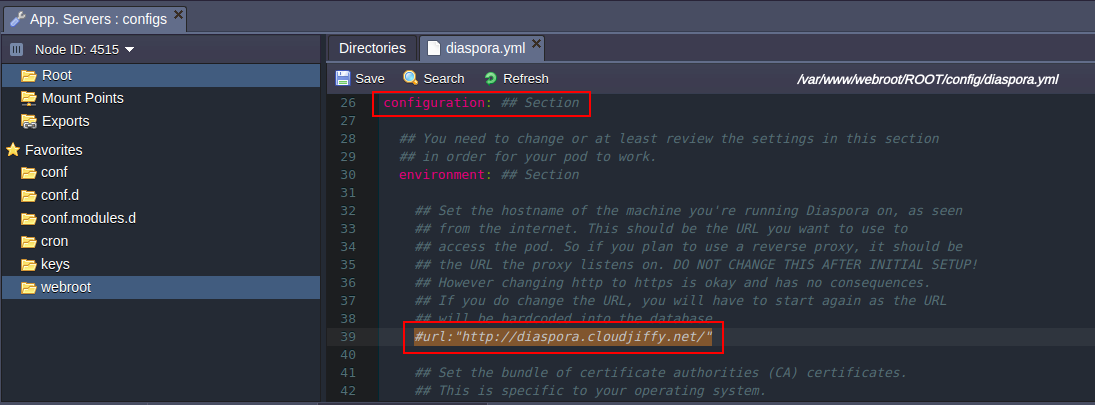
3. After that navigate to the configuration section in this file and change the following values:
- find the #url: “https://example.org/” string and paste your environment’s URL instead of https://example.org/ value (you can find it by pressing Open in browser button for your environment and copying URL in the address bar).
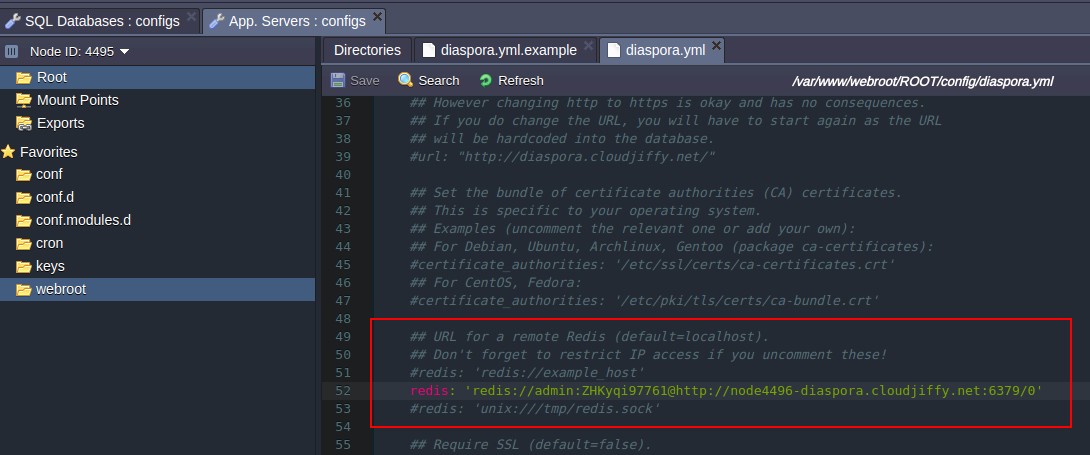
- scroll a bit lower and find the settings for remote Redis connection in the same file:
## URL for a remote redis.
## Don’t forget to restrict the IP access!
## Leave it commented out for the default (localhost)
#redis: ‘redis://exmaple_host’
#redis: ‘redis://username:password@host:6379/0’
#redis: ‘unix:///tmp/redis.sock’
Delete the # symbol from the #redis: ‘redis://username:password@host:6379/0’ line. Then substitute the values in this parameter with your own data, received via email after the environment creation (letter with Cartridge has been successfully created subject).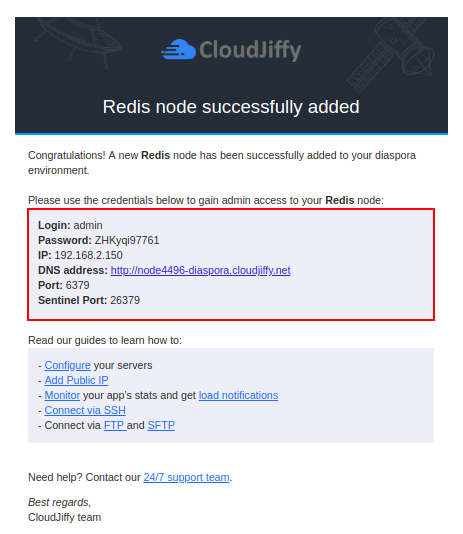 Change username and password values to the credentials for admin access to your Redis node. The same story with the host word: substitute it with the DNS address you can find in this letter.
- finally, locate the #require_ssl: true line. Change the true value to false.
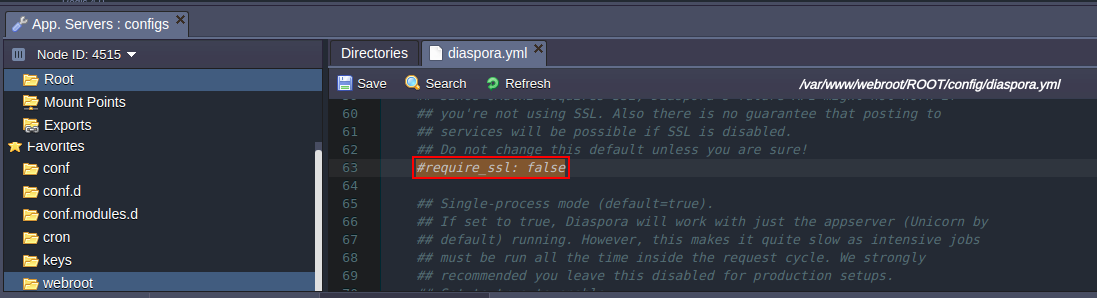
It’s time to Save the changes!
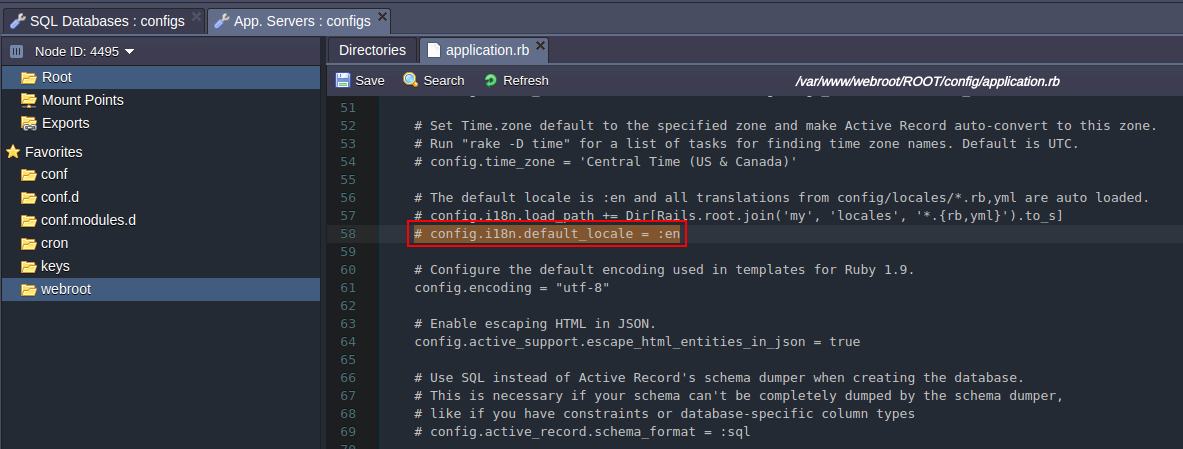
4. Then navigate to the application.rb file, located in the same config folder. Find # config.i18n.default_locale = :de string and change its value to :en.
Don’t forget to press the Save button in the panel above.
5. After that find the defaults.yml file (still in the config folder).
test:
environment:
url: ‘http://localhost:9887/’
change an url parameter’s value to the host url of your environment (it can be seen in the e-mail you’ve got earlier or by pressing the Open in browser button next to your environment and copying URL in the address bar).
You should get something like following: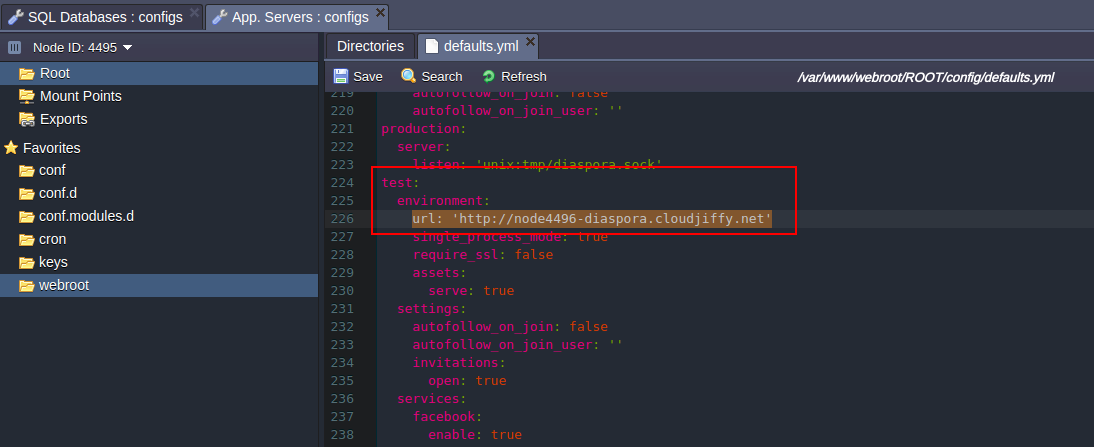
Save the changes.
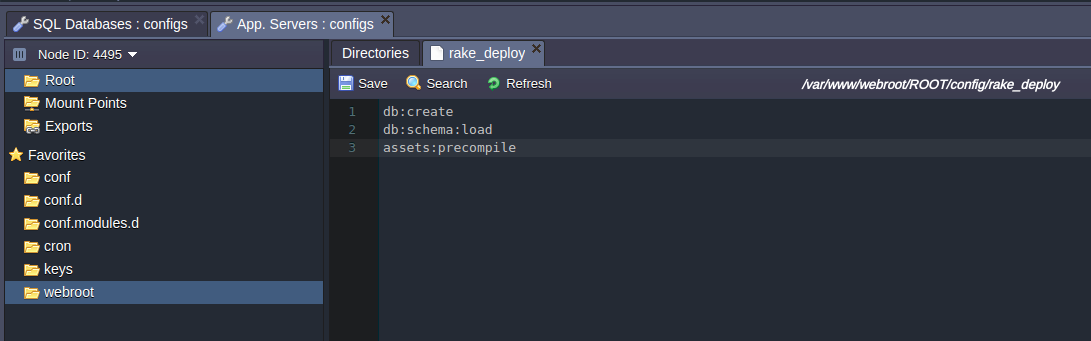
6. Finally, create new rake_deploy file in the webroot folder. Enter the following strings there:db:create
db:schema:load
assets:precompile
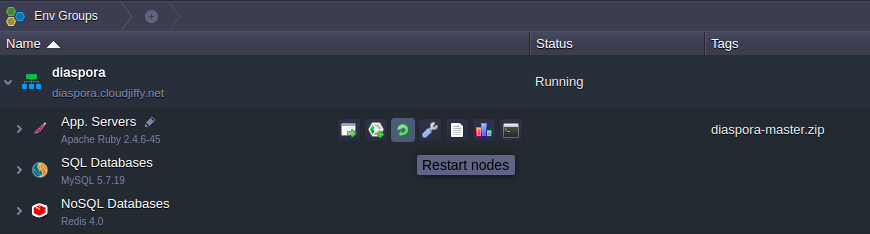
7. Press Save button one more time and Restart the Apache node in order to apply all the configurations you’ve made.
| Note: first restart of the server after new settings applying can take some amount of time, please, be patient. |
8. Now you can press Open in browser button for your environment and start working with your own Diaspora* application hosted.
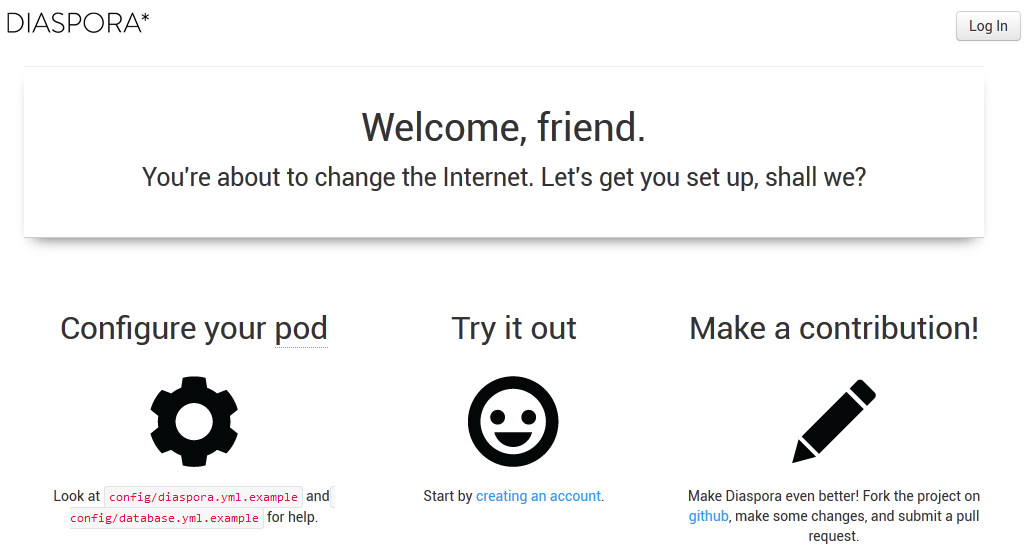
Enjoy!