
Exporting data for sharing
Exporting Data for Sharing
The Exports section of the in-built Configuration Manager is intended for managing data, that was exported from your containers by means of the Data Storage Container functionality. In other words, here you can review the files that are physically stored on one node, but are also shared with other containers at your BitssCloud account. Also, it provides options to export directories directly from this instance and control sharing permissions, as well as unmount shared data and set up some specific export parameters.
Note that only exports in confines of a single BitssCloud account are shown and available for managing in this section. So, let’s start from the basic Exports tab managing possibilities and subsequently review the directory export option in more detail.
Managing Exports
1. Click the Config button next to the container, which implements the role of storage – either a Dedicated Storage Container or any other-purposed server you’ve previously mounted the data from.

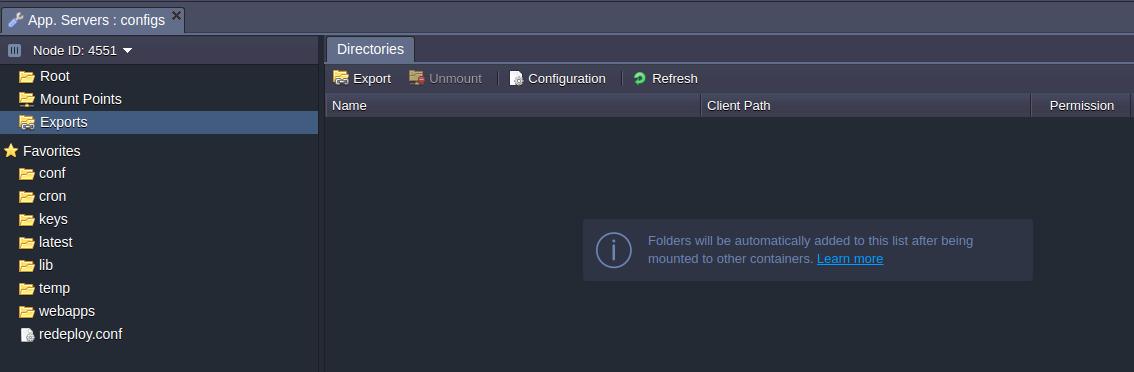
2. Within the opened Configuration Manager tab, switch to the Exports section. If you don’t have any exported data yet, you’ll be shown the corresponding notification:
3. Subsequently, all directories that were shared from this container to any node on the current Platform will be displayed here (whilst the externally exported data won’t be shown).
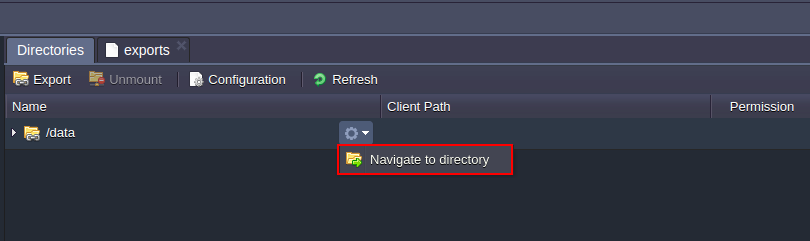
By hovering over any record and selecting the Navigate to directory option from the Additionally list, you can easily switch to the corresponding folder to review and edit its content.
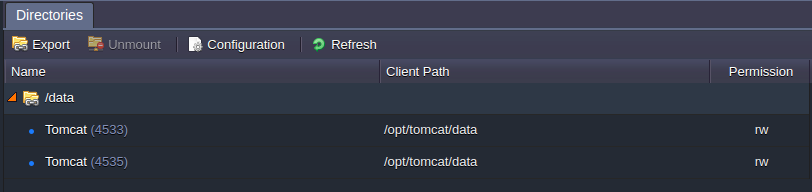
4. Upon expanding any string with a directory path (which designates the location where the exported data is stored on a current server), you’ll see the list of containers this folder is shared with. This can be done using the triangle button to the left or through a simple double-click:
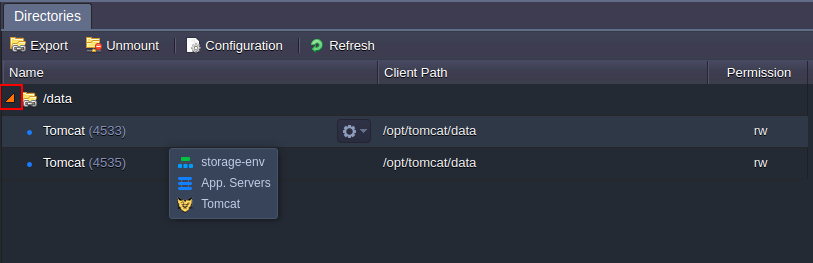
The following information can be found here:
- Name – shows server name and NodeID of the instance the exported data is shared with; when hovering over the particular record, you’ll see information on the environment, layer and node type of the chosen target container
- Client Path – path to the folder the shared data is available at the remote node
- Permission – displays access permissions for the corresponding client (rw – read-write; ro – read only)
5. At the tools panel above the list, you can find several buttons, intended to help you in managing your storage container exports.

- with the Export option, you are able to share any directory inside container with any other node at your account – the details can be found below, within the Directory Export section of this guide
- the next Unmount button, allows to stop sharing data with the selected client node (this functionality can be also accessed through the directory’s Additionally list):
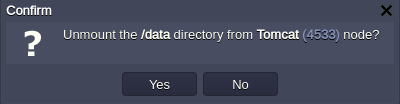 After confirmation, the corresponding record will be removed from the list and the appropriate data will become unavailable at the chosen instance.
 - upon clicking the Configuration button, you’ll be redirected to the etc/exports file, where you can check and edit (if needed) the list of exported folders, destination client node address (either IP or domain name) and additional export parameters
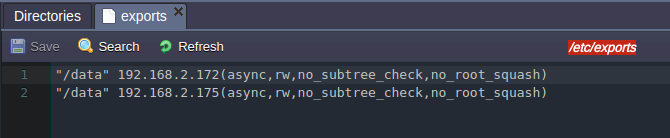 Note: If working in confines of your Cloud account, BitssCloud will adjust all of the required export configurations automatically. Thus, in most cases, editing of this file is not required and may be needed only for external exports – check the External NFS Server Configuration doc for more information.
 - you can Refresh the list of exported files with the same-named button to get the most recent shares state
- selecting the Docs button on the far right of the pane will redirect you to this documentation page
In case you need to perform some additional configurations besides of these basic ones, use the inbuilt file manager or connect to a node over SSH.
Directory Export
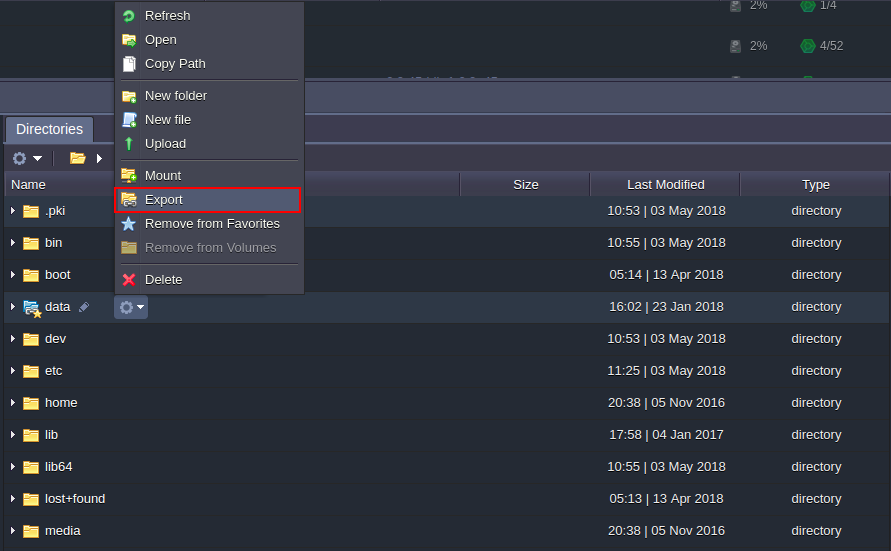
1. You can share any directory within a current container for being mounted at the remote server right through the Exports section, without switching to the target instance.

For that, click the Export button in the top pane.
2. The appropriate Export Directory tab will be opened.

Here, you’ll need to specify the following information:
- From NFS – drop-down list of containers within current environment layer to select the one the directory should be exported from
- Path – type in the full path to the exported folder (or choose it among favorite ones)
- To Container(s) – specify the target container to share the directory using the drop-down list of all nodes (in all environments) on your account
- Path – path to the location at the chosen target container the shared data should be available at
- Mount to all nodes – use this switcher to set the same mounts for being added to all nodes within the destination layer
- Read Only – turn the switcher on to restrict editing of the exported data at client node(s) (by default, the read & write permissions are provided)
Click Add to proceed.
Tip: The same form can be accessed directly from the node’s file manager, using the appropriate option in the folder’s context menu:
3. In a moment this exported folder will appear in the list.
That’s all! Now the shared directory is available for use at target container(s) without the necessity to copy and move any data across multiple servers.If you face any issues while exporting data for sharing, feel free to appeal for our technical experts’ assistance at StackOverflow.