
Extensions in PHP
PHP Extensions
At BitssCloud PaaS, PHP application servers are delivered with a number of embedded modules, which allows you to set different PHP extensions in httpd (Apache-PHP) and PHP-FPM (NGINX-PHP) daemons. Among these extensions, the following commonly required ones are inbuilt, i.e. loaded and run with PHP by default:
| ctype date dom ereg filter | hash libxml mhash pcre Reflection | session SLPxml sockets |
The rest of provided extensions are dynamic, i.e. they are included to the appropriate servers’ builds (being stored within the dedicated modules server folder) and can be enabled upon the necessity:
| apc.so apcu.so bcmath.so bz2.so calendar.so curl.so dba.so dom.so enchant.so event.so exif.so fileinfo.so ftp.so gd.so gearman.so geoip.so gettext.so gmp.so http.so iconv.so igbinary.so imagick.so imap.so | inotify.so intl.so json.so ldap.so mbstring.so mcrypt.so memcache.so memcached_2_1_0.so memcached_2_2_0.so mongo.so mongodb.so mysql.so mysqli.so mysqlnd_ms.so mysqlnd_qc.so mysqlnd.so ncurses.so oauth.so odbc.so opcache.so openssl.so pcntl.so pdo_dblib.so | pdo_firebird.so pdo_mysql.so pdo_oci.so pdo_odbc.so pdo_pgsql.so pdo_sqlite.so pdo.so pgsql.so phar.so posix.so propro.so pspell.so raphf.so rar.so readline.so recode.so redis.so shmop.so simplexml.so snmp.so soap.so solr.so solr2.so | sphinx.so sqlite3.so svn.so sysvmsg.so sysvsem.so sysvshm.so tidy.so timezonedb.so tokenizer.so uuid.so wddx.so xcache.so xdebug.so xmlreader.so xmlrpc.so xmlwriter.so xsl.so yaml.so ZendGuardLoader.so zip.so zlib.so |
Below, you can figure out how to:
- activate an extension
- configure an extension
- add your custom extension
Activate Extension
In order to make a dynamic extension available for the used PHP module (i.e. engine), it should be enabled within the corresponding configuration file.Note: The inbuilt extensions should not be loaded manually, as they are constantly running at all PHP servers in BitssCloud by default.
Below, you can find out how this can be accomplished:
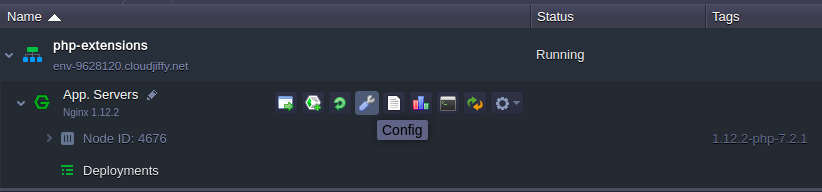
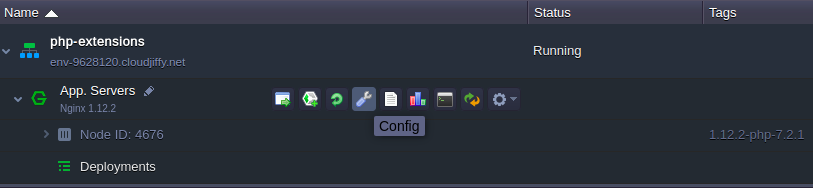
1. Click the Config button for your app server.
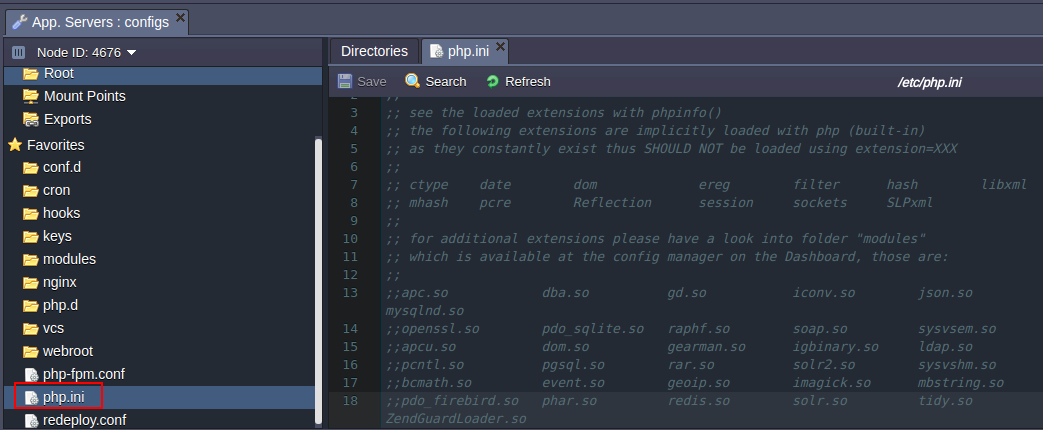
2. Within the opened configuration tab, move to the, etc > php.ini file and scroll down to the Extensions provided by BitssCloud section. Here, each dynamic extension has its own sub-section, where it can be enabled and configured.
4. Now, locate the required section (they are listed in the alphabetic order) and uncomment the extension={module_name}.directive inside (i.e. remove semicolons at the beginning of the corresponding line) to enable it:
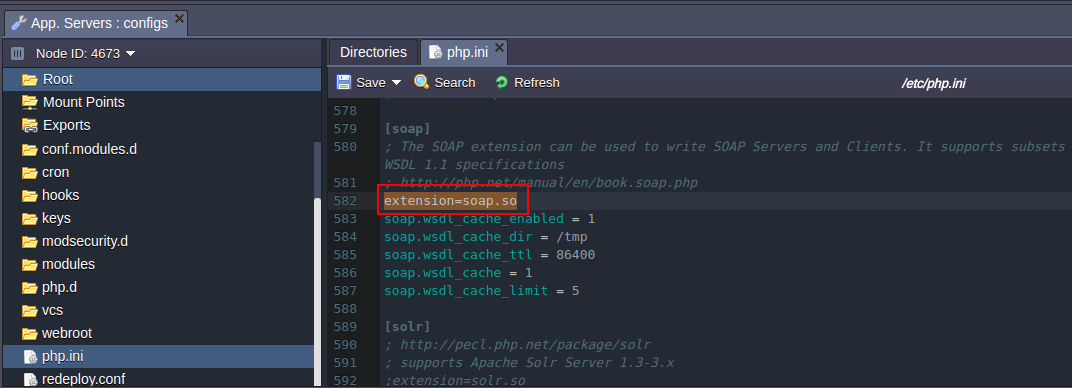
Also, here you can adjust the extension by means of the stated configuration parameters (or specify your own ones).
5. After all the necessary changes are made, do not forget to Save them and Restart the node to apply the new configuration.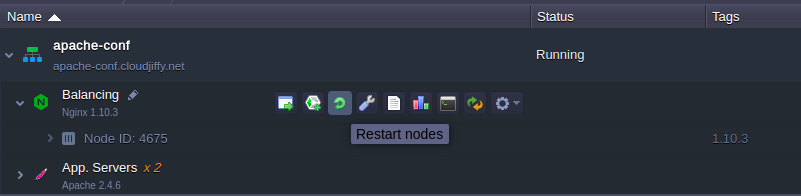
Configure Extension
All the necessary PHP modules’ settings are to be handled via the php.ini file. Herewith, the majority of provided dynamic extensions are specified with a set of possible configuration parameters alongside.As an example, let’s consider such for the dynamic OPcache extension – PHP accelerator, based on the opcode caching and optimization:
- opcache.enable=1
enable/disable OPcache extension - opcache.memory_consumption=64
set the amount of memory to use - opcache.interned_strings_buffer=8
set the amount of memory to be used for storing internal strings (e.g. classnames) - opcache.max_accelerated_files=4000
the maximum number of files to be cached - opcache.revalidate_freq=60
the frequency of checking file timestamps for the shared memory storage allocation to be changed - opcache.fast_shutdown=1
enable/disable a fast shutdown sequence for accelerated code - opcache.enable_cli=1
enable/disable OPcache for the CLI version of PHP
Add Custom Extension
In addition to all of the modules, available at BitssCloud out-of-box, you have the possibility to integrate your own PHP extensions to a server if needed. For that, just follow the instruction below:
1. Compile the extension itself.
2. Navigate to the BitssCloud dashboard and click on the Config button for your PHP application server.
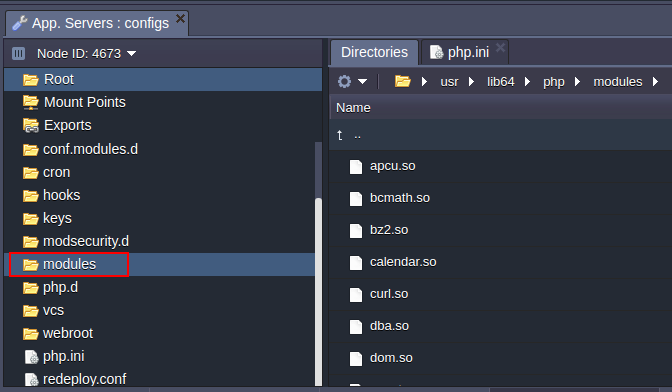
3. Now, using the opened manager, upload your custom extension to the modules folder. ( download the module and upload it) ( click on the settings icon and upload the module )
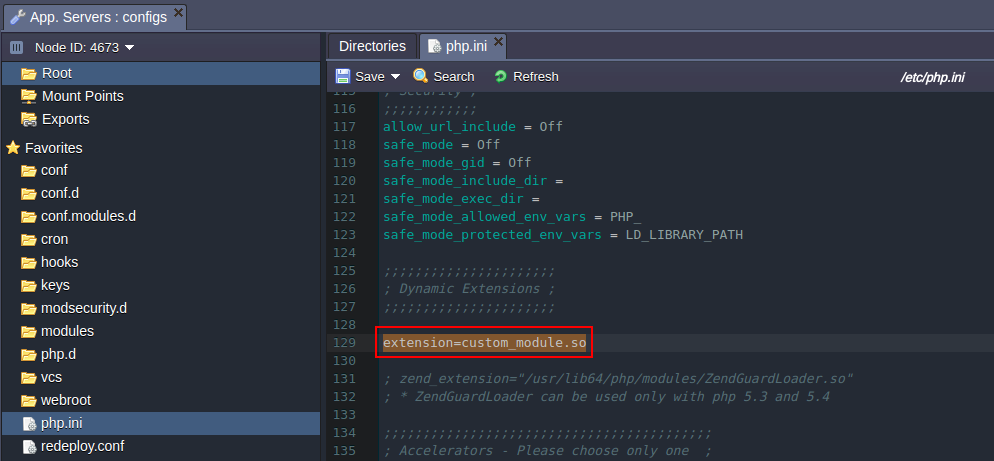
4. Move to the etc > php.ini file, find the Dynamic Extensions section and add the next command directive:
extension={module_name}.so
Tip: You can define all the necessary settings for your extension in the same section if needed.
5. Save the changes and Restart the node.

That’s all! Now your custom extension is activated.