
Container Firewall
Container Firewall Management BitssCloud Container Firewall feature provides a possibility to control your node’s availability both from inside and outside of the Platform. It analyzes such parameters as incoming request source, protocol, target node port, etc to flexibly manage access to your containers through setting the required connection rules.
Tip: If you want to restrict access between the environments on a single account, it can be automatically configured for you with the Network Isolation feature.
Container Firewall Management via BitssCloudUI
Each node at BitssCloudPaaS (excluding custom Docker- and Windows-based containers) is provisioned with a set of firewall rules, which can be reviewed and managed through a comfortable graphical user interface. The appropriate section can be accessed by clicking on the Settings button next to the required environment and selecting the Firewall menu item.
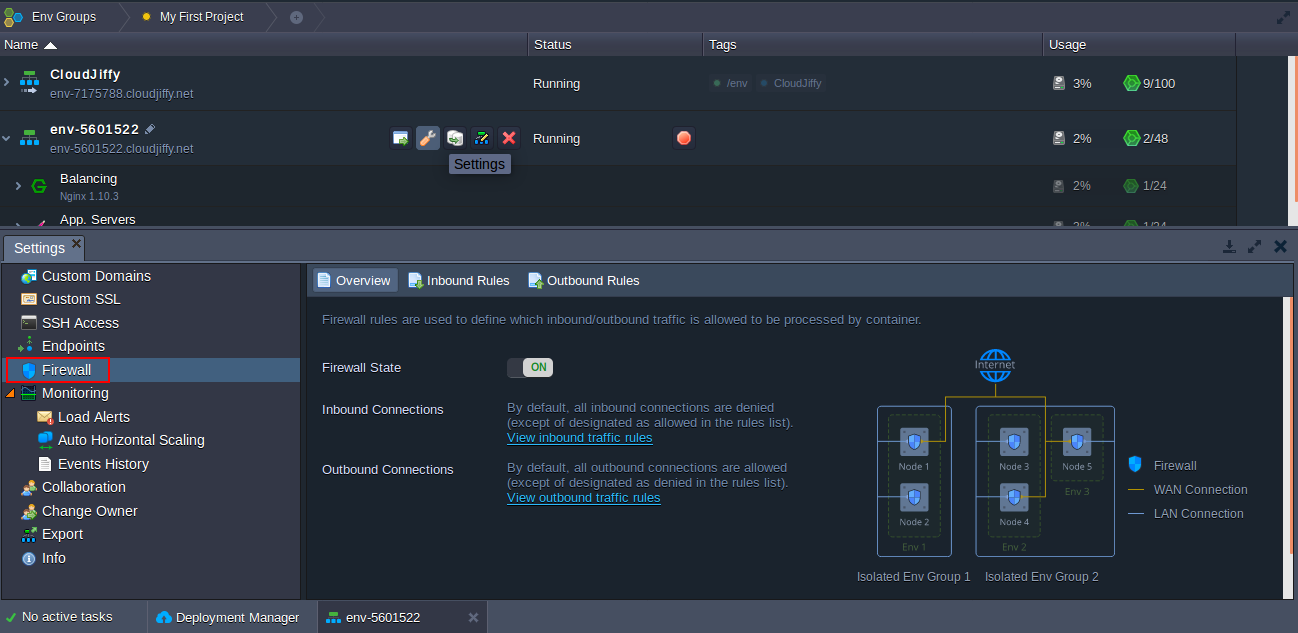
Here, the following tabs are available:
- Overview – provides general information on the feature, allows to change Firewall State (which is enabled for all containers by default) and shows Isolated Env Groups the current environment is included to
- Inbound Rules – allows managing incoming requests (not listed ones will be denied by default)
- Outbound Rules – allows controlling outgoing connections (not listed ones will be allowed by default)
Default Firewall Rules
BitssCloud automatically fills the Inbound and Outbound Rules sections with a number of records, required for the proper container operability.
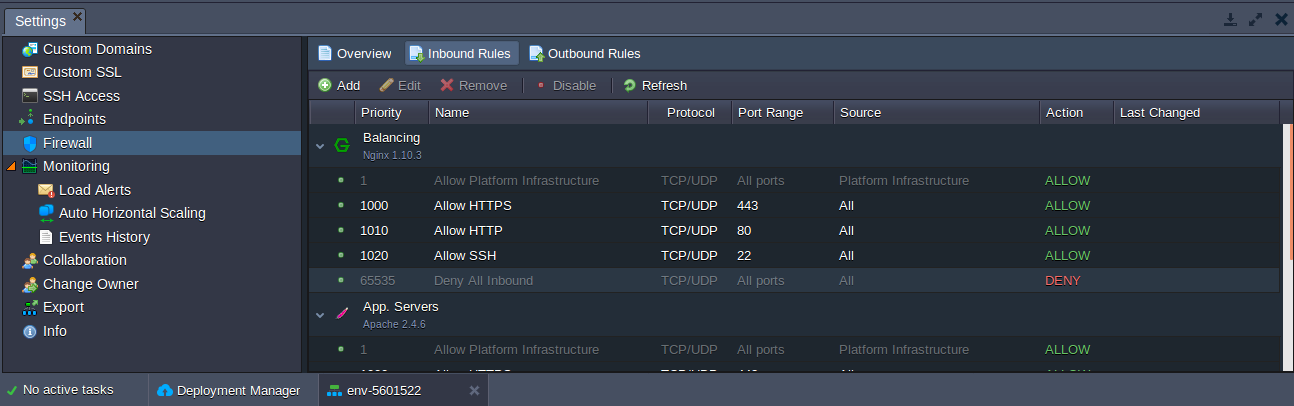
Here, rules are grouped by layers and are marked with the following color labels:
- gray for the default non-editable records (i.e. the obligatory ones)
- white for other default (stack-related) and user-added (either by an environment owner or his collaborators) rulesNote: Apply changes to the default rules only in the case you know exactly what you are doing, since these records are required to ensure stack specific functionality and to provide particular features support (e.g. to allow SSH, HTTP, HTTPS or FTP connections).
The very first record has the highest priority (1) and allows BitssCloudinfrastructure to access a container. While working with the container, some management operations (e.g. creating mount points, installing FTP addon, etc) can automatically complement the list of default rules. Herewith, each rule is added with a 10 points priority step, allowing to insert of new ones in between the default records without the necessity to edit the already applied connection permissions.
Rules Management
In order to manage existing and provide new rules to the firewall, the tools panel above the list contains a set of buttons for a convenient firewall rules management, namely: Add, Edit, Remove, Disable (Enable) and Refresh.
![]()
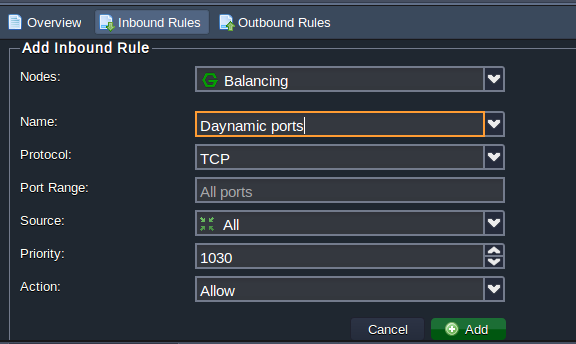
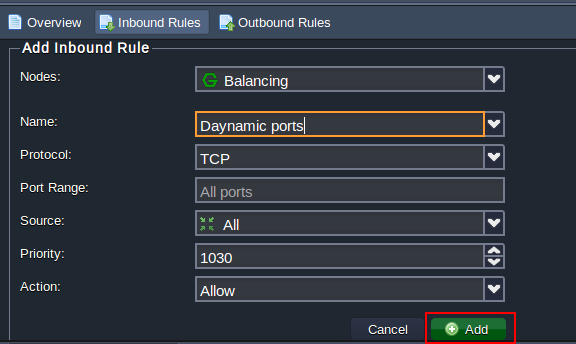
When adding a new firewall rule, the following parameters should be defined:
- Nodes – to select the required environment layer
- Name – to provide a name for this record (can be expanded to select from a number of commonly used rules)
- Protocol – to set the required protocol type (TCP, UDP or TCP/UDP)
- Port Range – to define a particular port (e.g. 80) or their range (e.g. 1024-2048) to be opened/closed for connection; leave this field blank to apply the rule to all ports
- Source – to select the request source:
- Custom IP Address(es) – a comma-separated list of IPv4/IPv6 addresses and CIDR blocks (e.g. 10.0.0.1,10.0.0.0/24)
- predefined ranges – All, All IPv4, All IPv6, Local Network, Internet (Public Access)
- Environment Nodes – node type (layer) from any environment on an account (after appliance this rule will be automatically adjusted upon the appropriate layer scaling)
- Priority – to set a rule priority (where rules with the lower value will be applied first)
- Action – to define the required action upon receiving the matching request (either allow or deny)
Subsequently, if meeting the necessity to Edit any of predefined rules, you’ll be able to adjust all of the above-described parameters except the Nodes field (i.e. target layer can not be switched). Also, with testing purposes, you can temporarily exclude some firewall records and reapply them later on with the appropriate Disable/Enable buttons. After some adjustment (for example, topology change), you may need to update the list of rules with the Refresh button.Firewall Use Cases
Firewall can be used to allow or deny access to your nodes based on such request specifics as IP address, protocol, port and so on. In this guide, we’ll consider the basic example of blocking access to a container from a particular IP address via:
- User Interface
- SSH connection
Note: Before following this guide, ensure that the appropriate container is provided with a Public IP address.Also, for some automation solution, you may need to apply firewall changes via BitssCloud API, learn about all of the appropriate methods within the linked section. Restrict Access via User Interface
BitssCloud provides a powerful GUI for firewall management directly in the dashboard.1. Click the Settings button next to the appropriate environment and switch to the Firewall section within the opened tab.
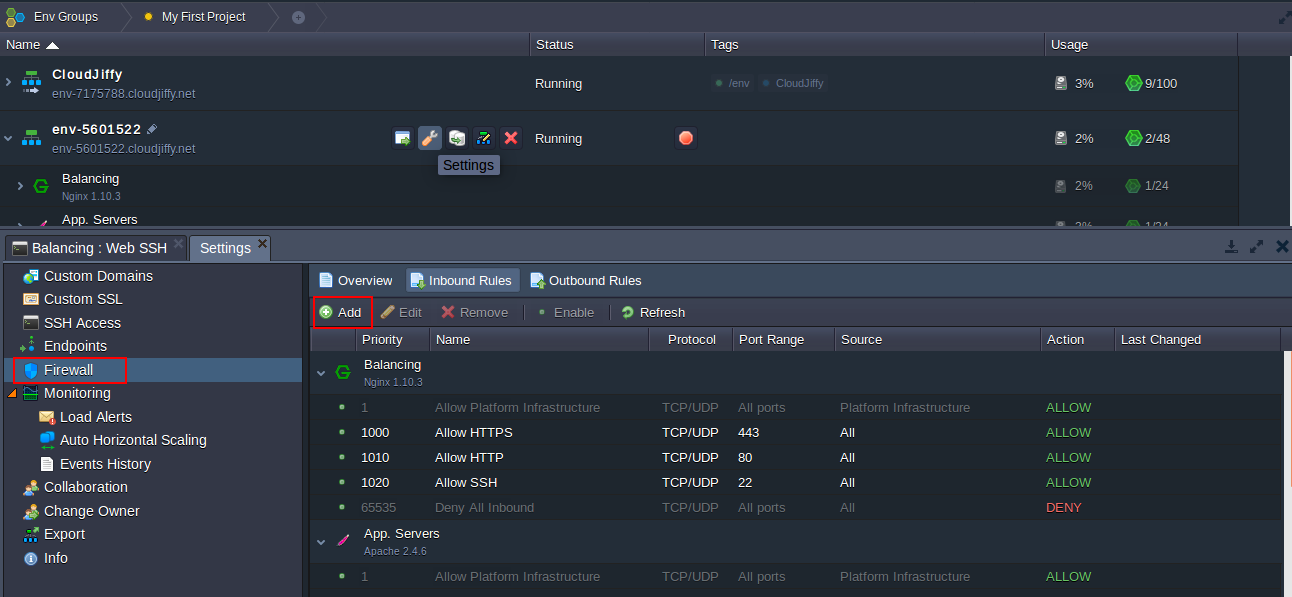
Here, select the Inbound Rules subtab and click on the Add button.2. In the opened Add Inbound Rules form, you can configure a new rule.
In order to deny connection from a particular IP, fill in the fields as follows:
- Nodes – chose a container to restrict access to (tomcat in our case)
- Name – input any desired rule name (e.g. my-rule)
- Protocol – select a required protocol (TCP)
- Port Range – deny access to all ports by leaving this field blank
- Source – choose the Custom IP Address(es) option and type the necessary IP in the appeared Address Range field (111.111.111.111)
- Priority – set the appropriate priority for this record (e.g. 900 to be applied before the default rules)
- Action – Select the Deny option
Click Add to save and automatically apply your rule.
3. Now, when connecting to your node from the specified 111.111.111.111 IP address, the following page will be displayed for user:
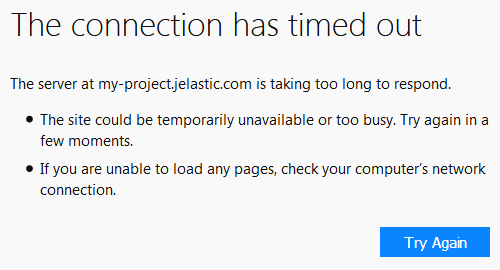
This way you can deny access to your containers from any IP address.