
MySQL PHP Connection
Connection to MySQL/MariaDB for PHP
MySQL and MariaDB are highly popular open-source databases, used by developers all over the world. Follow the instruction below to learn how to connect your PHP application, hosted within BitssCloud Cloud, to one of these DB servers.
Environment Creation
1. Log into your BitssCloud dashboard.
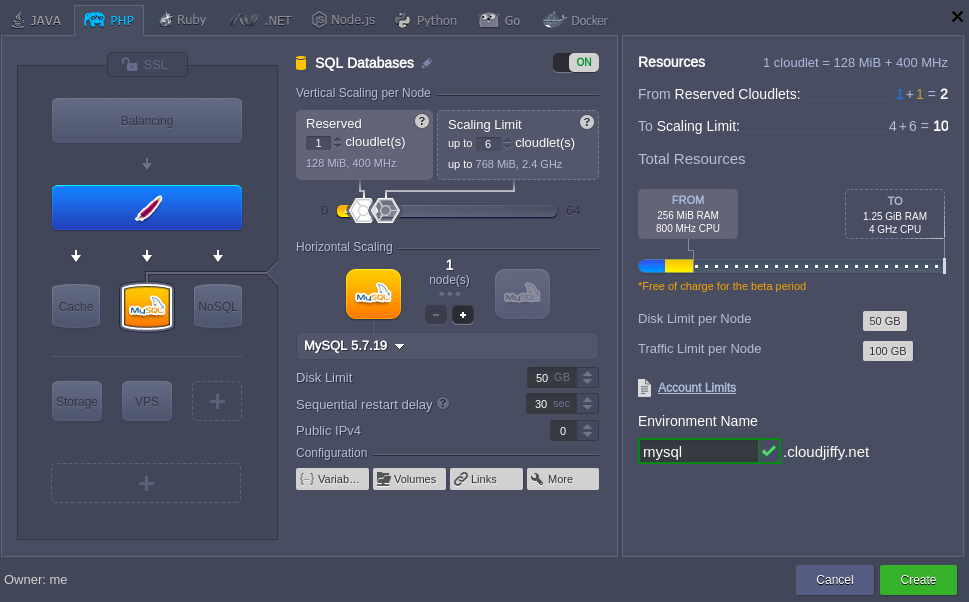
2. Create an environment with MySQL or MariaDB database server (both are available within the SQLwizard section).
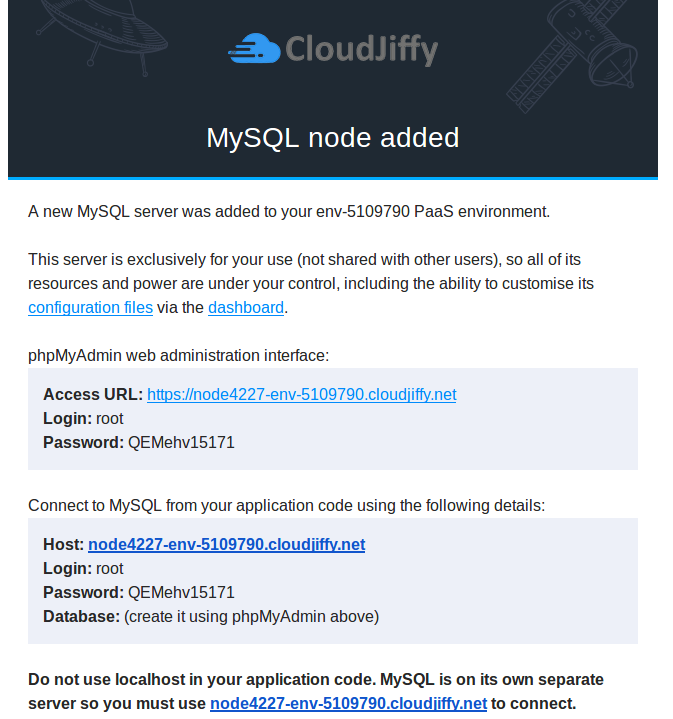
3. Check your email – it should contain a message from Robot@jelastic with the administration details (access URL, login, and password) for your MySQL or MariaDB server.
4. Return to your dashboard and click the Open in browser button for the corresponding MySQL or MariaDB node in your environment.
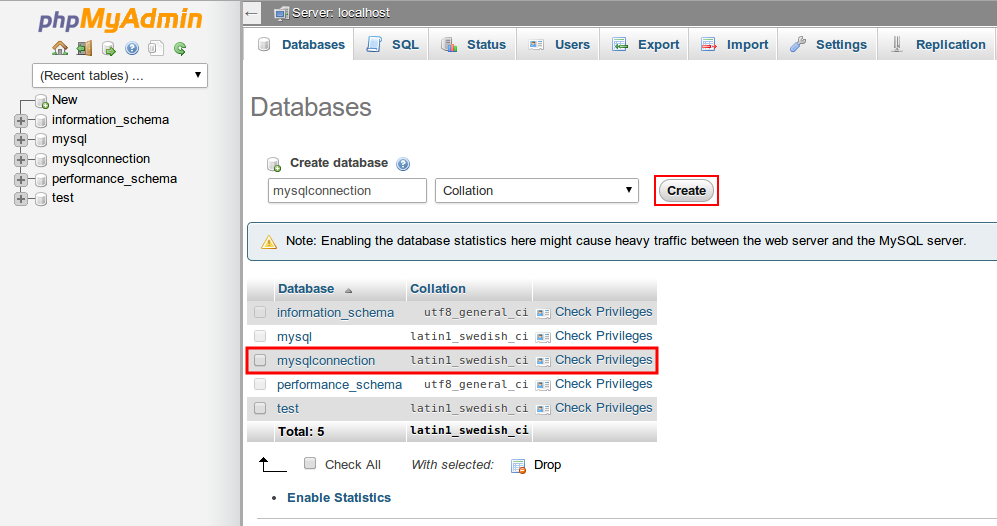
Log in to the opened admin panel using the information you’ve received in the abovementioned email. Here you can create new databases (just in the same way as it is shown in the image below for the mysqlconnection one) for your application’s data storing and manage them.
5. Now you can upload your PHP application package to the Jelastic Deployment manager and deploy it to the created environment (or perform the deployment from your GIT/SVN repository).
Connection to the Database
Once your project is successfully deployed, you need to connect it to your database. For that, your application should be appropriately configured.
There are 3 main PHP functions, used for DB connection.
1. String for establishing a connection to your MySQL/MariaDB node:
mysql_connect(‘HOST’, ‘USERNAME’, ‘PASSWORD’);
The appropriate values should be substituted with your data:
- HOST – MySQL server address that you’ve received via email, specified without the https:// part:
{db_type}{node_id}-{env_name}.{hoster_domain}
where
{db_type} – depends on the type of database server you’ve chosen: should be mysql for MySQL and mariadb for MariaDB
{node_id} – ID of the container with the database server you want to establish the connection to. It can be seen on the dashboard:
- USERNAME – the name of the admin DB user; the default one is root.
- PASSWORD – password for your DB server; the default one can be also seen inside the email with database credentials.
2. For the selection of the necessary database, use the next string:
mysql_select_db(‘DB_NAME’);
wherein DB_NAME parameter should be substituted with the name of the needed database.
3. In order to close a connection to your database, execute the following:
mysql_close( );
All other available MySQL functions can be found here.
| You need to specify the necessary functions in every *.php page, which should be connected to the database. |
Checking the Connection
In order to ensure everything works fine, you can check the connection using this code:?
|
| Note: Do not forget to substitute HOST, USERNAME, and PASSWORD in the connection string with the corresponding values (as it is described in the Connection to the Database section of this instruction.) |
If everything is OK then, after browsing the URL( for ex: mysql.BitssCloud.com) you will get a message Connected Successfully.
Executing a Simple Request
And here is an example of how to execute a simple request to your database and output it onto a table.
The plain PHP script below will establish a connection to your database server (do not forget to specify the appropriate hostname and credentials), connect to the default mysql database it contains, read the values from the help_topic table, and display them in a self-generated table.
|
As a result, you’ll receive a kind of index for all available MySQL functions with links to the instructions on their use.
Great! Now you can easily connect your PHP application to the MySQL or MariaDB database.