
PHP Connection to MongoDB
MongoDB is a widely used NoSQL database, implemented based on the document-oriented model and intended for storing semi-structured data. The guide below provides an instruction on how you can easily use it in a bundle with your PHP app, hosted within the BitssCloud .
Create an Environment
Enter your email address within the one-click installation widget below to get an environment with the MongoDB server created, in just a few clicks: or perform this manually using the following instruction:
Log into your BitssCloud account and create a new environment with the MongoDB node of the preferred version (can be found within the NoSQL wizard section).
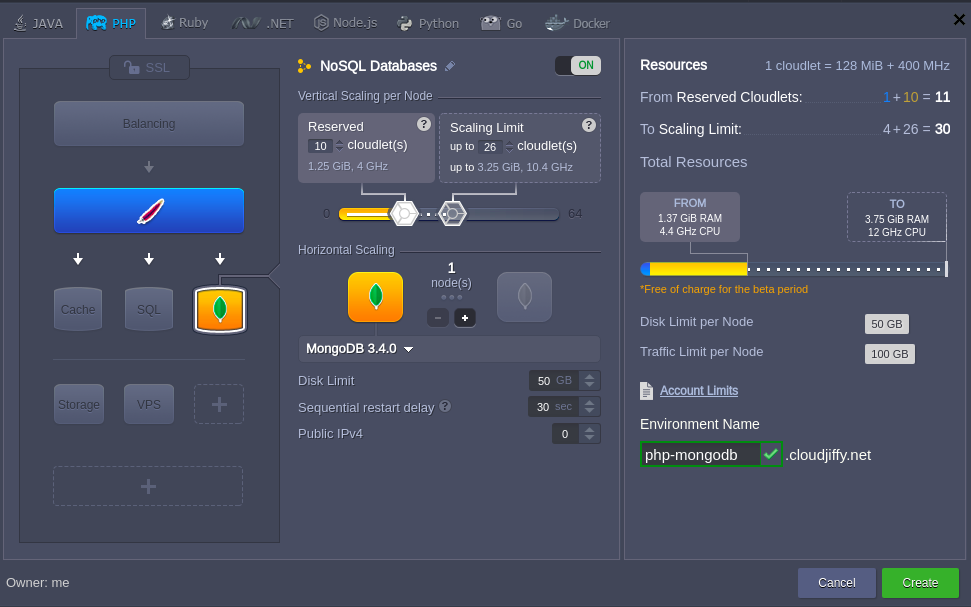
Add all the rest of the necessary instances (if there are any – we’ll also include Apache to subsequently deploy a test app to it; however, it could be located in a separate environment as well) and configure other required parameters, like the amount of resources, region, environment name, etc.
Click the Create button when ready and wait for a couple of minutes for your environment to be set up.
MongoDB Configurations
1. Enter your email box and find a letter from Robot@BitssCloud, which contains your MongoDB instance details and access data:
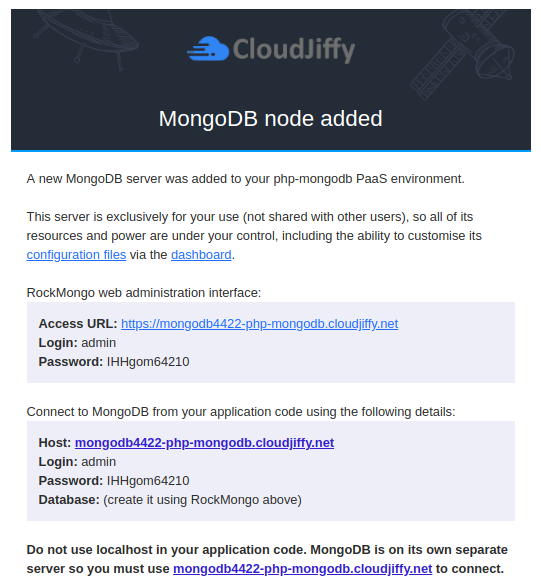
2. Here, click on the Access URL link or switch to the dashboard and Open in browser your MongoDBnode.
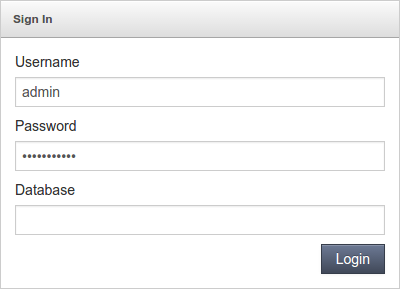
In the opened browser tab, you’ll see the Sign-in form for the MongoDB admin panel. Enter the admin credentials you’ve received within the abovementioned email and click Login to access it.
3. Now, let’s create a separate database to establish the connection. For that, switch to the Databases tab and specify a Name for it within the Create Database section (for example, mongodb-connect).
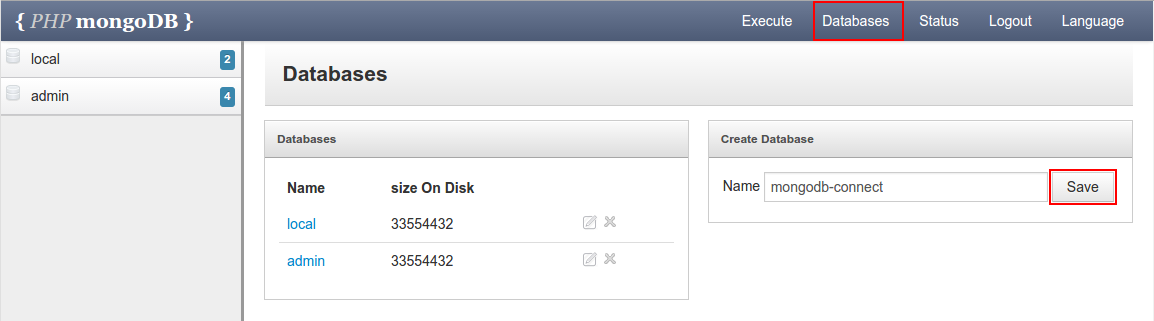
Click Save to proceed.
4. The next step is to create a separate DB user for working with our newly added database. Thus, switch to the Execute tab and paste the following command inside the shown input field:
db.createUser({ user: “user_name”, pwd: “password”, roles:[{ role: “readWrite”, db: “db_name”}]})
where
- user_name – name for your new DB user
- password – password for this user
- db_name – database (the above created one is suggested) this user will have the read/writepermissions for
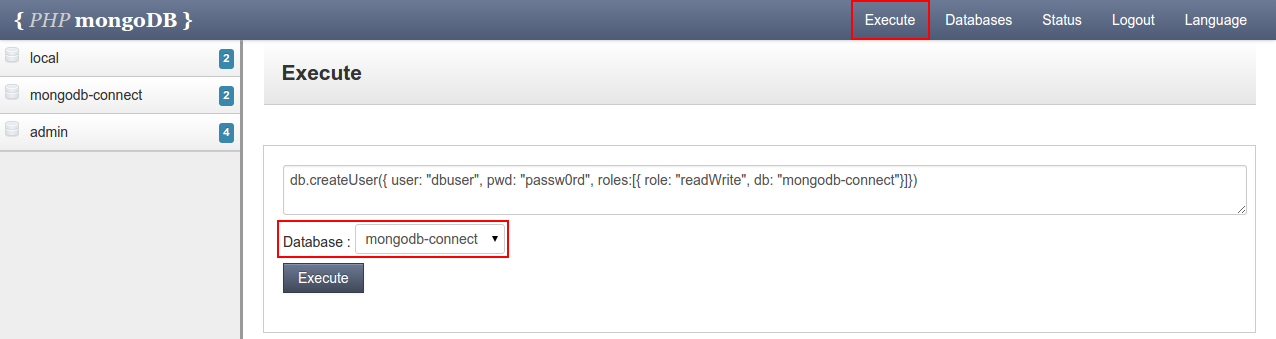
Then, select the corresponding database using the drop-down list below and Execute the specified command with the same-named button. You’ll get the success response in just a few seconds.
5. Now you need to activate the dedicated connection driver for enabling the interaction between your app server and MongoDB. At BitssCloud, it is included in all PHP app servers’ builds by default. Note that starting with the 4.3 BitssCloud version, there are two driver versions available at all of the newly created PHP app servers:
- mongo.so (currently, it’s considered deprecated)
- mongodb.so
Both these extensions implement different API, so we recommend using the legacy module for keeping old applications running, whilst adapt your new projects due to the latest one. Tip: The current version of the used BitssCloud installation usually can be seen within the logo in the top-left dashboard corner. Additionally, you can check it within the BitssCloud Union Catalog.
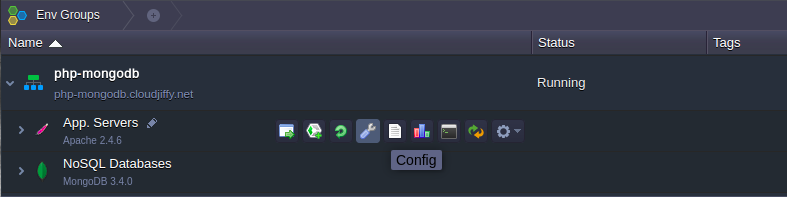
So, in order to enable the required driver, return to your dashboard, hover over the compute node in your environment, and click on the appeared Config button.
6. Within the opened configuration manager tab, expand the, etc folder and choose the php.ini file inside.
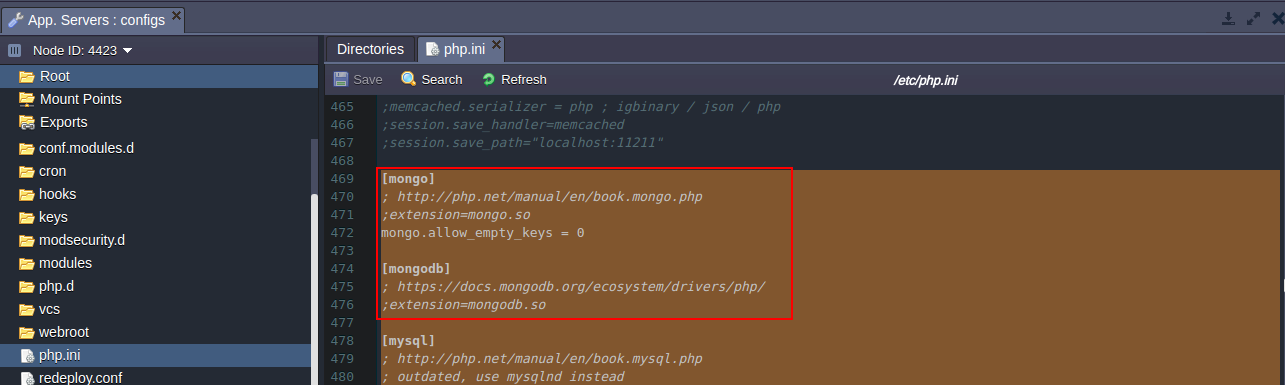
Scroll down to the approximately 483rd line and uncomment the string with the required driver (either mongo. so or mongodb.so extension) by removing the semicolons mark at its beginning.
7. Save the performed changes and Restart your app server node to apply them.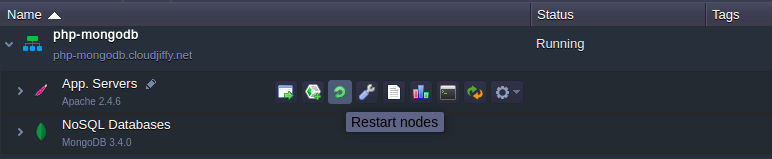
Application Deployment
Now you can proceed to application deployment into the environment you’ve just prepared – either using the BitssCloud Deployment Manager (for projects, packed into a single archive) or fetching it directly from a GIT/SVN repo.
As an example, we’ll use the following simple app, designed to verify the establishment of a connection between the corresponding compute node and the specified MongoDB server by means of the latter mongodb.so extension.
index.php:
<html> <head> <title>Test MongoDB Connection</title></head> <body> <h1>Test MongoDB Connection</h1> <form action="#" name="form" method="POST"> <table cellspacing="10"> <tr><td>Host</td><td><input type="text" name="host" value="<?php echo htmlspecialchars($_POST['host']); ?>" size="40"></td></tr> <tr><td>User</td><td><input type="text" name="username" value="<?php echo htmlspecialchars($_POST['username']); ?>" size="20"></td></tr> <tr><td>Password</td><td><input type="text" name="password" value="<?php echo htmlspecialchars($_POST['password']); ?>" size="20"></td></tr> <tr><td>Database</td><td><input type="text" name="database" value="<?php echo htmlspecialchars($_POST['database']); ?>" size="20"></td></tr> <tr></tr> <tr><td> </td><td><input type="submit" name="sub" value="Test Me!"></td></tr> </table></form> <?phpif (@$_POST['sub']){ $host=$_POST['host']; $username=$_POST['username']; $password=$_POST['password']; $userdb=$_POST['database']; $database=$userdb.".phptest"; try{ $manager = new MongoDB\Driver\Manager("mongodb://{$host}/{$userdb}", array("username" => $username, "password" => $password)); if ($manager) { $bulk = new MongoDB\Driver\BulkWrite; $bulk->insert(['x' => 1]); $bulk->insert(['x' => 2]); $bulk->insert(['x' => 3]); $manager->executeBulkWrite($database, $bulk); $filter = ['x' => ['$gt' => 1]]; $options = [ 'projection' => ['_id' => 0], 'sort' => ['x' => -1], ]; $query = new MongoDB\Driver\Query($filter, $options); $cursor = $manager->executeQuery($database, $query); } }catch(Exception $e){ echo "<center><h1>Doesn't work</h1></center>"; print_r($e); exit; }} if ($host) echo "<center><h1>Good connection</h1></center>";?> </body></html> |
Thus, if you’d like to test the connection itself, just download the already wrapped package with the project, shown above, and deploy it.Tip: For the legacy driver version (i.e. mongo.so), please use this test application. The workflow will be similar to the described below.
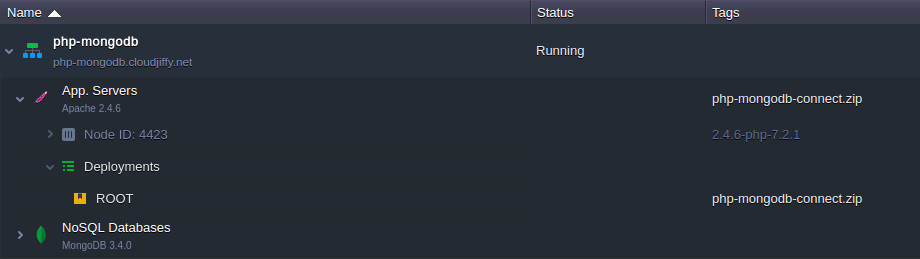
Consequently, you’ll receive an environment, similar to the one shown above.
Connection Check Up
1. Open your environment in Browser with the same-named button – you’ll see a simple form for entering your MongoDB database details.
< im10 >
The following values should be specified:
- Host – link to your database admin panel without the https:// part (can be found within the corresponding email or just copied from the browser address bar after clicking Open in browser for your MongoDB node)
- User – name of the user you’ve assigned to the database (dbuser in our case)
- Password – password for the user, specified within the previous field
- Database – name of the required database (mongodb-connect in our case)
After the data is entered to the corresponding fields, click on the Test Me! button.
2. If the specified information is correct, the Good connection message will be shown.
< im 11 >
Otherwise, you’ll get a notification that your connection Doesn’t work and the detailed output of the error this was caused by.
3. In addition, upon a successful connection establishment, the new phptest collection with a few new records inside will be added to the specified database.
< im12 >
Thus, you can navigate to your DB’s admin panel for making sure everything works correctly and proceed with performing any other required operations.