
Docker Container Configuration Tools
BitssCloud dashboard allows adjusting some of the most commonly required Docker container settings without the necessity to access it via SSH. For that, we’ve integrated the Docker container settings dialog frame to the BitssClooud topology wizard. Simultaneously powerful and user-friendly, it gives you the ability to configure your containers in the easiest and comfortable way.So, to start with, you need to access the above-mentioned frame. There are two ways this can be done through:
- via topology wizard – click on the New environment button and add the needed container(s) or hit the Change environment topology button for the already created environment.
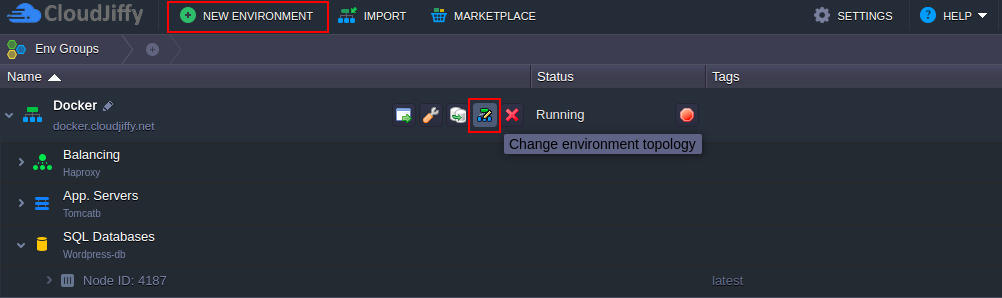
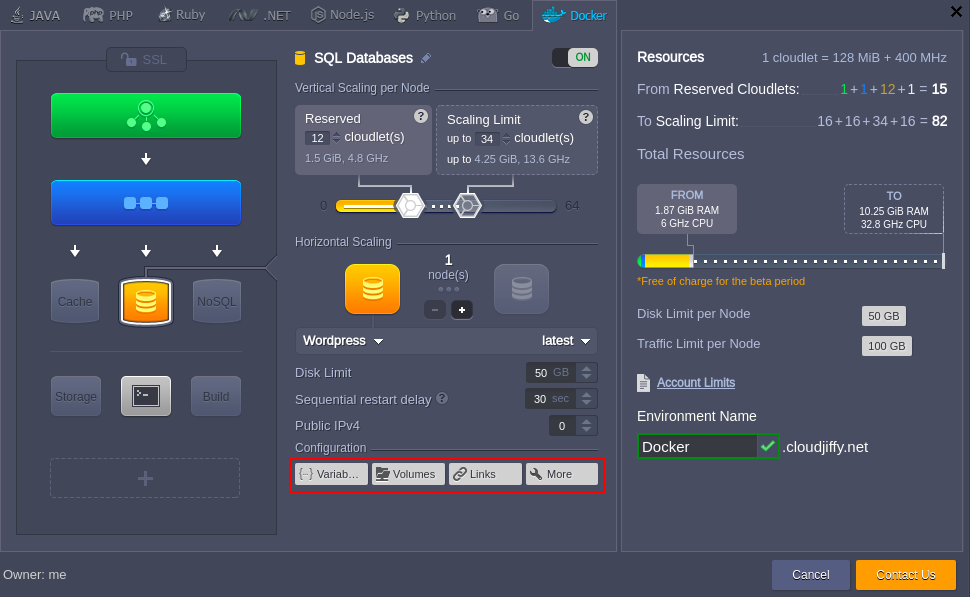
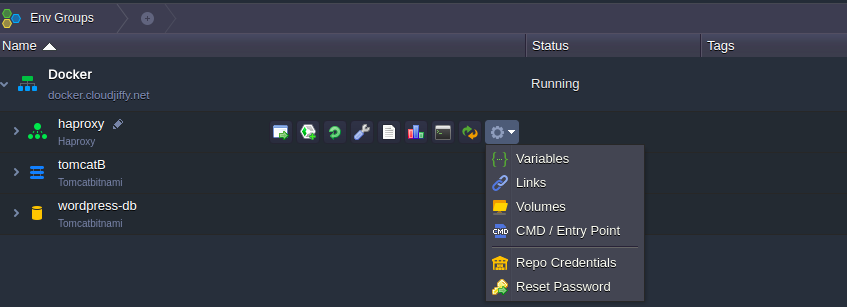
Then choose a container that needs to be tuned and select the appropriate Configuration section at the bottom (circled in the image above).Tip: With BitssCloud , any container can be preconfigured even before being created – the necessary data is automatically fetched from image manifest upon accessing the configuration wizard. - directly from the dashboard – hover over your Docker-based environment, click on the gear icon next to the required layer and pick one of the quick access options from the expanded list
After that, the Docker layer settings window will appear:
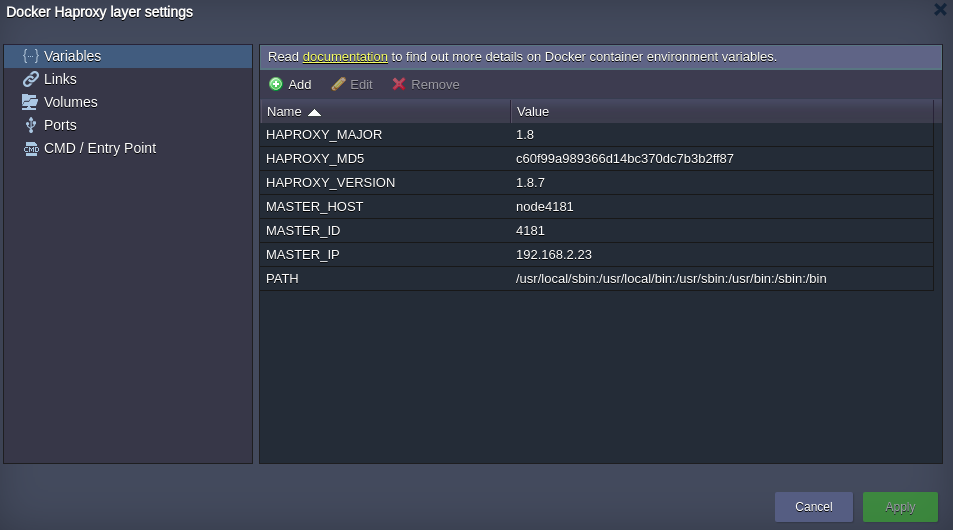
As you can see, it contains 5 separate sections with the next settings’ options (follow the appropriate guide below for the section you are interested in):
- Variables
- Links
- Volumes
- Ports
- Cmd /Entry Point
Other Tools
In addition to the dedicated configuration wizard, BitssCloud ,Cloud provides a number of supplementary tools, intended to help you in managing your Docker-based environments:
- Embedded file manager
- Log file
- Access via SSH
File Manager
The in-built BitssCloud Configuration Manager is designed to manage the files inside your container (including the ones, that are available and/or exported by means of Data Storage Container functionality). The appropriate tab can be opened by clicking on the Config button next to the necessary node (or the whole layer):
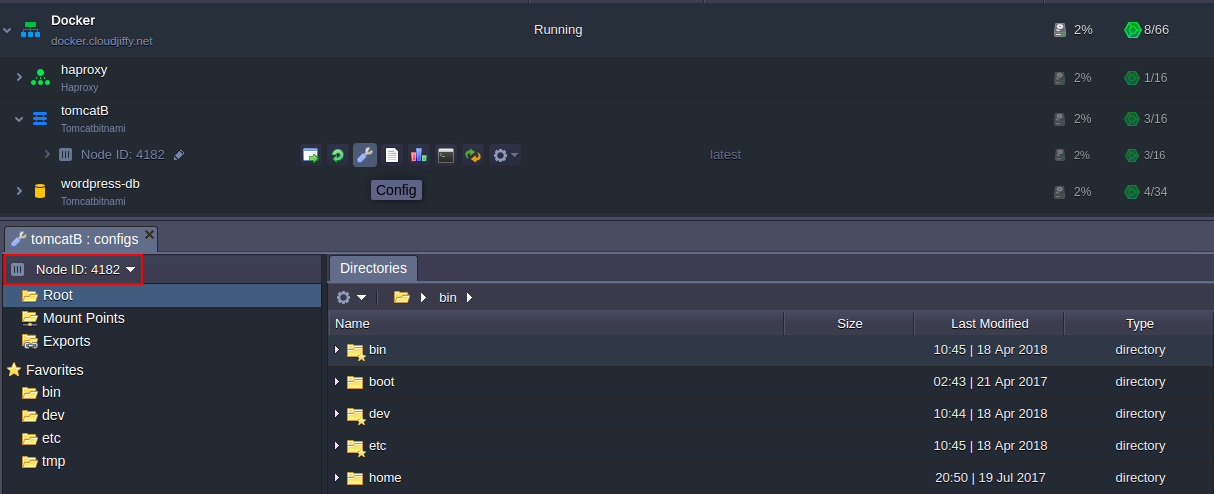
It includes 4 main sections:
- Root (File Manager) – gives you easy access to container local filesystem, where you can operate the comprised data and instance settings within the corresponding configuration files
- Mount Points – list of folders, that are physically stored on a remote node but can be used at a current container through mounting the directories with required data
- Exports – list of folders, which are shared with other nodes, i.e. are exported to be available at the remote instances whilst being stored locally
- Favorites – files and folders you’ve marked as favorites so that you have quick and simple access to them (where paths to added volumes are added to this section by default)
Tip: In case the appropriate environment layer includes multiple same-type containers, you can easily switch between them directly inside the manager by choosing the required one within the corresponding drop-down list at the top pane (circled in the image above).
Being granted the full root permissions while working with Docker’s file manager, you can take full control over image file system with no extra tools required. However, be aware of what you are modifying, as in case something will get broken, the changes you’ve applied couldn’t be automatically reverted.
Logs
Another section of the BitssCloud dashboard, which may help you to manage your Docker-based solutions, is Logs. Here, the data on all aspects of your container’s lifecycle is gathered, which may come in handy while troubleshooting and/or debugging your Dockerized application or service.
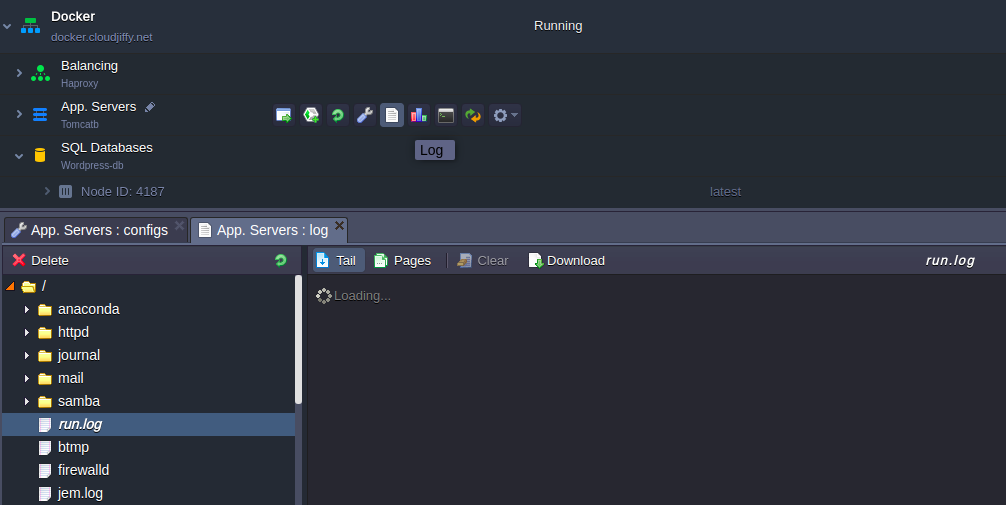
Note that the list of shown log files and directories depends on a particular image settings and can vary.
The log files inside a container are automatically rotated, so when any of them reaches the size of 50 MB, it is automatically compressed and moved to the dedicated rotated_logs directory. To view such archives (if necessary), you need to enter the appropriate container via SSH and download them for examining locally. The compressed logs are stored for 7 days, after which they will be automatically removed, being considered as obsolete data.
Also, when creating a new Docker-based environment or redeploying the already existing containers with another tag version, you’ll be proposed to Show Logs within the corresponding dashboard notification after the operation is finished.
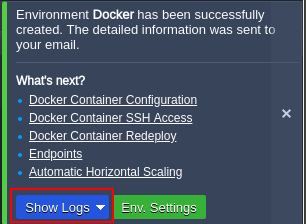
Upon clicking this button (which represents an expandable list to select a particular node in case several of them were involved), the following data will be hand out depending on the handled action:
- In case of container creation, the dedicated run.log file will be automatically opened (if such was predefined within the deployed template), where the main information on container start up and appeared errors (if any occurred) are stored
- If initiating container redeploy, you’ll be shown the details on the performed update, with the appropriate node(s) ID, tag version and process duration
SSH Access
If you prefer to manage your containers via terminal, you can easily connect to any of them via SSH, no matter whether has it the external IP address attached or not. With the full root permissions automatically granted, you get true freedom for operating your instances through executing the necessary operations directly from your local machine.
In addition, the platform is supplied with the dedicated BitssCloud CLI client, which allows handling the vast majority of operations, required for your application’s lifecycle management, by means of a set of special scripts. Herewith, the structure of the commands this could be accomplished through is completely similar to the BitssCloud API hierarchy, so you can easily get used to the client.